Circle of Stars in Adobe Illustrator

The following tutorial comes out of a great question sent to me via email from Daniel Bosic, a Layers Magazine Tips of the Day reader from Canada. He asked if there is a way in Illustrator to create stars that follow around a circular path – 12 five-pointed default stars, all the same size with all of their top points pointing straight up, to be exact.“Sounds simple enough,” I thought. “Something I can easily do with the Rotate tool. Or I can even make a simple Pattern Brush.” But when I tried these possibilities, I realized that neither would work. The top point of the star points out from the circle, not straight up like in the European Union logo (with a circle of 12 stars) or the original American flag (with 13 stars in a circle). I pondered, “Is this even possible?” Follow the steps below and see for yourself.Open a new document in Illustrator. Draw a star with the Star tool by clicking with the tool, typing in a size, and pressing OK. Click again with the tool a distance away from the first to draw a second star of exactly the same size.Select the Blend tool (W) and click on the top point of the first Star, then Option-click (Alt-click on PC) on the top point of the second star. In the dialog that opens, select Specified Steps from the Spacing popup and specify 11 steps. (One more than you actually need. You’ll see why later.)Click with the Ellipse tool (L) to draw a circle.Then select both the circle and the Blend by marqueeing across both with the Selection tool. Go to Object>Blend>Replace Spine and the circle will become the new Spine of the Blend.The stars will follow around most, but not all, of the circle. To fix this, first turn on Smart Guides (View> Smart Guides) if they’re not already on. Select the circular Spine with the Group Selection tool (hidden under the Direct Select tool). Choose your Scissors tool (C) and click on the top cen-ter anchor point of the circle to cut it, which makes it an open path. Because the Spine now has a beginning and an end, the stars will stretch around the entire circle. The last star is directly above the first. (That’s the reason for the extra Specified Step in the Blend.)
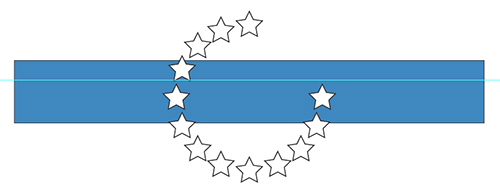
Add any finishing touches. Sit back and admire your work! You’ve just accomplished the impossible.

Visitor Comments »


whoa! very nice! can see using this trick soon!


Comment by sluce | March 20, 2008 @ 5:43 pm


Great tip!


Comment by kevin | April 11, 2008 @ 11:14 am


Jeff,

This solution was positively brilliant. I can just picture the gerbils running in their cage as you tried to figure out the solution to Daniel’s conundrum.

Never say die. :)

~Annie


Comment by Annie Cushing | April 18, 2008 @ 8:43 am


thank you so much! i was going crazy trying to figure this out!


Comment by Derrick | April 24, 2008 @ 11:15 pm


That was great indeed, is there a way to do it on Photoshop CS3 please? Thank you.


Comment by Harry | May 5, 2008 @ 1:01 am


the tutorial was great, but now I need you to take it a step further. I want to make a peace sign out of stars…is there anyway to ensure the circle and the inner part can line up symmetrically and retain the same amount of spacing in between the stars as in the circle part?


Comment by Brian | May 5, 2008 @ 3:33 am


each stars must rotate!


Comment by Otis | June 6, 2008 @ 5:26 am


it’s very fine please sent me more Mr. Daniel


Comment by haris | June 21, 2008 @ 2:43 am


Or you could just use the polar grid to make a GUIDE…Just set the radial divider number to 12. Seems easier and more intuitive to me.


Comment by Thomas | July 2, 2008 @ 4:49 pm


Couldn’t you just break the circle into 11 segments and use smart guides to copy a single star 12 times and click select the center of each of your 12 copies and drag them to the 12 anchor points between the 11 segments? Admittedly I do have a script with will break a path into equal segments.


Comment by Ronald Stepp | July 13, 2008 @ 4:57 am


Hi Ronald,

Yes!

But setting it up as a Blend is faster.

And what if you decided to change from 12 to 13 stars? As a blend, you can just go to Object>Blend>Blend Options and make the change to 13 and press OK. You’re done! 13 perfectly space stars around a circle.

Ace


Comment by Jeff Witchel | July 14, 2008 @ 4:46 pm


Oh yeah! Thanks!


Comment by Michel Pettigrew | August 13, 2008 @ 4:36 pm


great work, thanks, please send me more tips


Comment by porsellvan | September 1, 2008 @ 9:47 am


You can sign up for the “Layers magazine Tips of the Day” @ http://www.layersmagazine.com (half way down the right side of the Layers Magazine home page).

Ace


Comment by Jeff | September 1, 2008 @ 11:37 am


wow, what a nice tut!


Comment by jaime | September 11, 2008 @ 7:09 am


wow, there seems to be an answer to every question i have on the internets. this one was bugging me. it was so simple to do in freehand, a couple of simple steps. i was cursing adobe as i was reading my tutorial book as i couldnt find the solution and here it..all be it a tad more complicated than it should be…hope adobe incorporate the best of freehand into their illustrator soon.


Comment by mz | September 19, 2008 @ 5:56 pm


in my fume, i forgot to add, well done for figuring this out and thank you…i owe you a coke!


Comment by mz | September 19, 2008 @ 6:06 pm


When I do these kind of stuff I always use the rotate tool.

Make the star and keep it selected ->
Choose the rotate-tool in the menu ->
Alt-click in what will become the center of the ring of stars ->
Type in 360/12 for 12 stars (thats 360 degrees divided in 12->
Just copy until you have 12 stars in a perfect circle with stars rotating with the circle.

Thats just my way of doing it


Comment by Conny | October 13, 2008 @ 6:11 pm


Hi Connie,

If you try it with the Rotate tool, you’ll see why it doesn’t work. Normally I would do the same thing, but with a star…the top point of the star will no longer be pointing straight up as it’s rotated.

Jeff


Comment by Jeff (AdobeAce) | October 13, 2008 @ 6:27 pm


I have tried this 3 to 4 times with no result. My stars are not staying pointed up. they are rotating with the circle. I have followed every step…


Comment by Tanker | November 1, 2008 @ 3:04 pm


Hi Tanker,

In your Blend Options (Object>Blend>Blend Options), make sure your Blend Orientation is to the PAGE, not the PATH.

Jeff


Comment by Jeff (AdobeAce) | November 2, 2008 @ 8:15 pm


Hi Jeff,
Thanks a lot for your post. I have tried it again and it worked. I have been wanting to do this since I have noticed the Euro flag. The CNN Situation Room has a similar arrangement but some of their stars at the bottom of the ring are not straight. The Oval Office carpeting is supposed to be the same way if I am not mistaken…


Comment by Tanker | November 6, 2008 @ 6:35 pm


I was looking everywhere to find an easy way to make a circular array of any object in Illustrator. Half of the people said to try a different program, the other half had extremely difficult and involved tutorials. THIS IS GREAT and super simple!! Not only can I use this to make an array of the same sized/colored objects, but if I just adjust the size or color of either object at the end of the blend it opens up all sorts of options. Arrays of objects of diminishing sizes. Arrays that blend from one color to the next, etc., etc. Can’t thank you enough! Fantastic tutorial!


Comment by ohbrutha | November 13, 2008 @ 6:41 pm


Hi ohbrutha,

Thanks! Glad you liked it.

Jeff


Comment by Jeff (AdobeAce) | November 14, 2008 @ 5:38 pm


That was an awesome tutorial!! Thank you tons! It’s EXACTLY what I needed.


Comment by Spiffy Mom | March 12, 2009 @ 12:25 pm


Thanks ! This kinds of tutorial, I increase my knowledge.


Comment by rajesh | August 17, 2009 @ 4:49 am

Leave us a comment

Comments RSS | TrackBack URI

Back to Top


Advertisement
Creative Suite Tutorials
  1. Photoshop Photoshop
  2. Illustrator Illustrator
  3. Indesign Indesign
  4. Dreamweaver Dreamweaver
  5. Fireworks Fireworks
  6. Premiere Premiere
  7. Flash Flash
  8. After Effects After Effects
  9. Lightroom Lightroom
  10. Acrobat Acrobat

Get the latest tips, tricks and news delivered straight to your inbox.

From our Partners
Subscribe to Layers Magazine


  • Back to the Layers Magazine Homepage
  • Creative Suite Tutorials
  • Layers Magazine
  • Reviews on top products
  • Layers Magazine Reader Forums
  • Subscribe to Layers Magazine