Cascading Style Sheets: Choosing the Right Selector
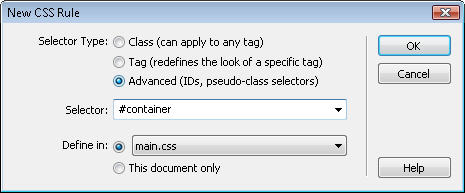
Even if you’ve been working with CSS for a while, understanding (and remembering) the differences among the various types of style selectors can be a challenge. As you can see in this screenshot, when you create a new CSS rule in Dreamweaver, the first thing you need to do is specify if you want to create a rule using a class, tag, or advanced style selector.
If you’re still trying to understand the differences among the various selector options and when you should choose one or another, this tutorial provides an overview of some of the most common CSS selector options and how best to use them in Dreamweaver.
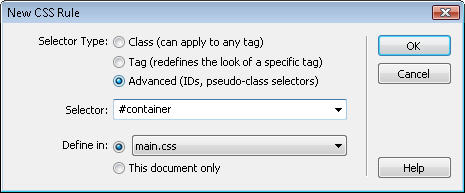
Creating Styles with the Class Selector
The class selector is the most versatile selector option. Class styles can be used to format any element (from text to images to multimedia) and they can be used as many times as you like on any page in a Web site.
Class style names always begin with a period, thus a class style might look like this:
.caption.
Dreamweaver will help you with the period (more commonly called a dot). If you forget to include a dot when you create a style with a class sector, Dreamweaver will add one to the beginning of the style name for you.
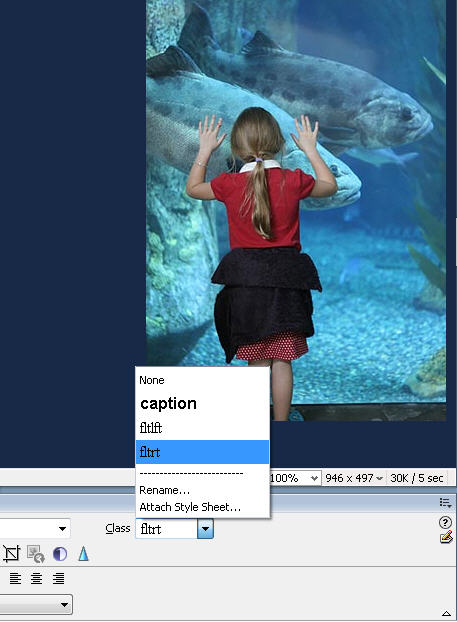
Because class styles must be applied to an element before they take effect, these styles are appear in the Styles and CSS drop-down lists in the Property inspector in Dreamweaver. (Styles created with tag or advanced selector do not appear in these drop-down lists because they are not applied in the same way.)
In the screenshot shown here, you can see the class styles .fltrt (float right) and .fltlft (float left) which are included in most of the predesigned CSS layouts included with Dreamweaver. These styles are designed to align images and other elements to the left or right so that text or other elements can wrap around them. Creating styles to align images and other elements is one of the most common uses of the class selector.
Photos by Janine Warner
Creating Styles with Tag Selector
The tag selector is used to redefine existing HTML tags. Select this option if you want to change the formatting options for an HTML tag, such as the H1 (heading 1) tag or the UL (unordered list) tag.
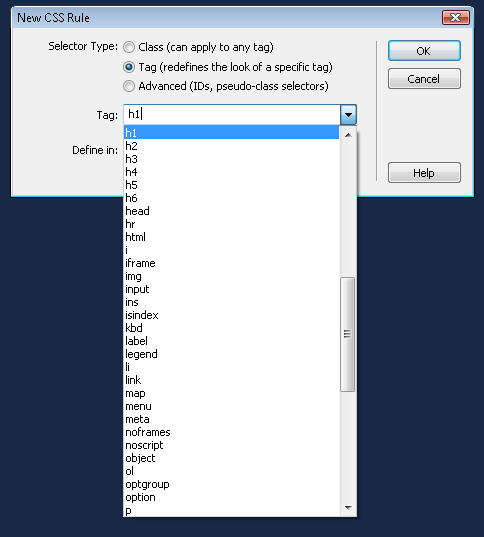
When you choose the tag selector in Dreamweaver, you can type in any HTML tag or use the drop-down list in the New CSS Rule dialog (shown in this figure), to select from a list of HTML tags. (This is a handy reference because the name of the tag style must match the HTML tag exactly for it to work.)
In many cases, redefining existing HTML tags with CSS has advantages over creating new styles. For example, content formatted with the H1 tag is well recognized on the Web as the most important text on a page. For that reason, many search engines give priority to text formatted with the H1 tag. Similarly, the hierarchical structure of the H1-H6 tags helps ensure that even if a visitor to your site changes the text size in their Web browser, text formatted with the H1 tag will still be larger relative to text formatted with an H2 tag, which will be larger than text formatted with the H3 tag, etc.
The ability to change the appearance of heading and other tags with CSS makes it possible to retain these advantages while still being able to use the font, size, color, spacing, and other formatting options that you prefer in your Web design. When you use the tag selector, the style definition is automatically applied to any text or other element that has been formatted with the corresponding tag. Thus, if you’ve formatted a headline with the H1 tag and then create an H1 style it will automatically apply to the headline.
Creating ID Styles with the Advanced Selector
The Advanced Selector option in Dreamweaver can be used for multiple style types, including ID styles.
ID styles must begin with a # sign, but Dreamweaver does not add it automatically. If you want to create an ID style, you have to type the # sign at the beginning of the name. For example, #story (Note: do not include any space between the # and the style name).
ID styles should only be used once per page and are ideally suited to formatting div tags and other block level elements. Thus, ID styles are great for creating page layouts. In the predesigned CSS layouts included in Dreamweaver, all of the designs are created by combining a series of HTML div tags with ID styles using names like #container, #wrapper, and #footer. This is a common convention on the Web, and is considered by many designers to be the best approach to designing Web pages today.
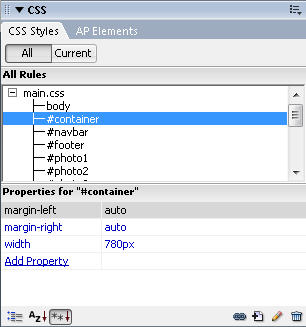
Creating Descendent Styles with the Advanced Selector
The Advanced selector can also be used to create descendent styles. Descendent styles combine two or more styles to create a style definition that only displays when one style is contained within another. Descendent styles are useful when you want to do something like use the H1 tag in multiple places on the same web page with different formatting. For example, you could create one style for headlines that appear in the main story area of a page and then create another style for headlines that appear in the sidebar on the page and still use the H1 tag to format both.
Descendent styles are created by combining ID, class, or tag styles and look like this:
#sidebar H1
Note that you must include a space between each name or tag. In this example, the style definition will apply only to H1 tags that appear within another element, such as a div, that is formatted with an ID style #sidebar.
If a descendent style combines more than one tag, it is written like this:
#sidebar h1 a
Again, you must include a space between each name or tag. In this case, the defined style for the a (anchor, or link tag) will only apply when the link is located inside an element formatted with the H1 tag that is also inside an element formatted with the #sidebar tag. A descendent style like this makes it possible to create links that look different when they appear in a headline in the sidebar of a page than when they appear in other parts of the page.
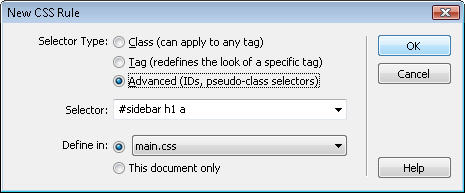
Once you learn the differences among these style selector options and when they are best used, you’re well on your way to mastering the art of creating Web pages with CSS in Dreamweaver.
Bio
Janine Warner has authored more than a dozen books about the Internet, including Dreamweaver CS3 for Dummies. She’s also the host of more than 50 hours of Web design video training for Total Training. A popular speaker, she has been working online since 1995. (www.JCWarner.com)

