Curvy Cross Processing in Photoshop CS3
CATEGORIES: Tutorials, Photoshop, Digital Photography | Mark Fleming | February 21, 2008
This tutorial describes one of my favorite techniques for 'spicing' up a photograph. This method is adapted from the color darkroom of old. In those days, innovative photographers often processed film in a chemical solution intended for another type of film. For instance, they might process color slide film in C-41 chemicals. The result yielded a most unusual shift in color, which created a very retro look. To recreate this technique using the computer is both easy and fun.
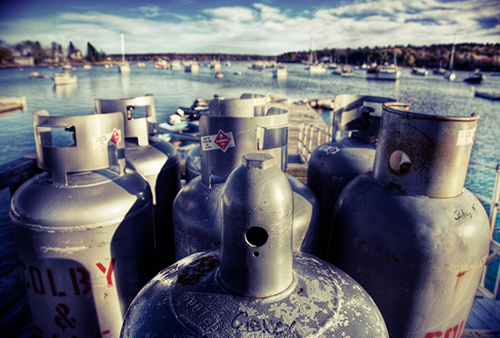
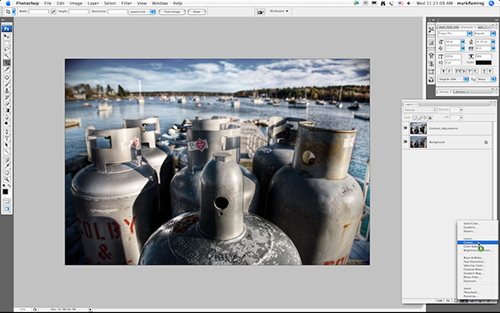
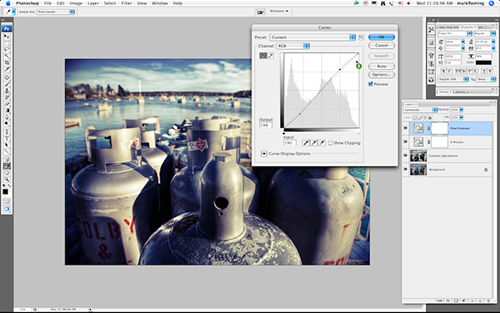
Begin with a processed image that has high contrast. Despite selecting a high contrast image, add even more contrast by selecting a curves adjustment layer from your layers palette.

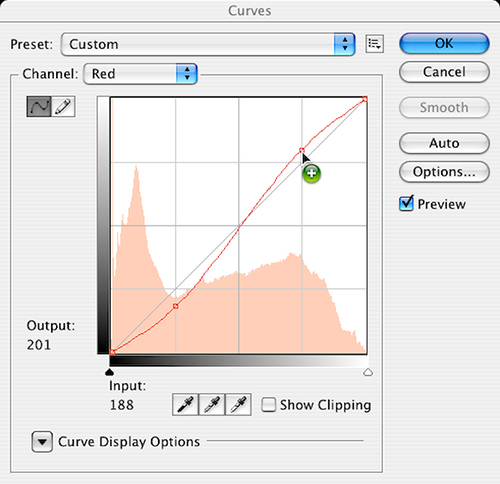
Repeat this process by adding yet another curves adjustment layer, this layer will be used to create the cross processed look. Inside that curves adjustment layer you will select each channel individually from the drop down menu, begin with the Red Channel.
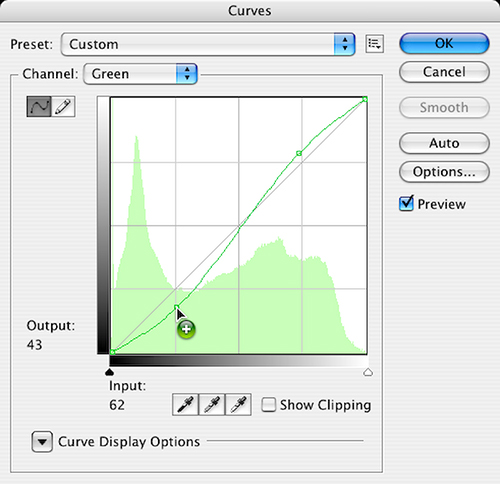
The basic rule of thumb is to raise the red and green in the highlights, and to drop the red and green in the shadows. The reverse is true in the blue channel.


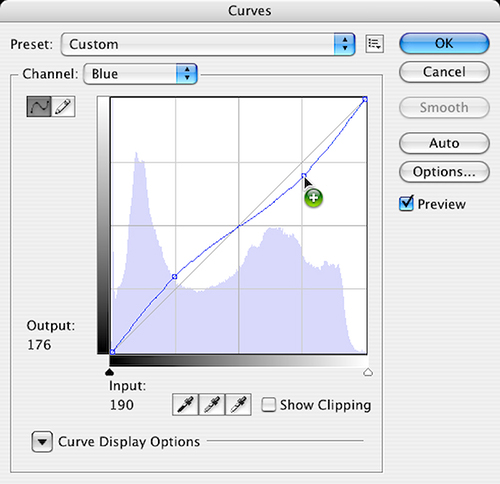
Drop the blue in the highlights and raise the blue in the shadows.
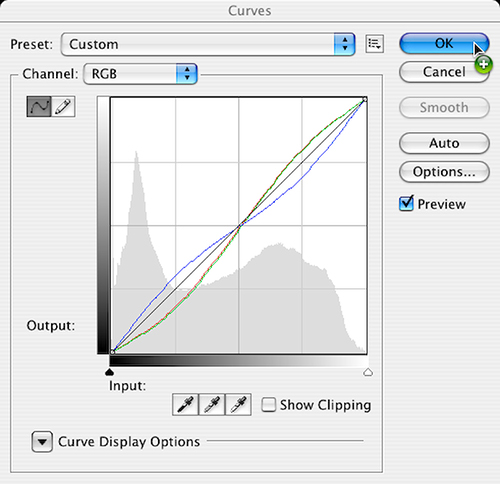
Note as you work through the previous steps that much of the adjusting is based on your own personal preference. Each of your adjustments is up to you and should match your vision of how the image should look.
At the conclusion of these steps, the result will resemble a twisted helix

Once you have completed your desired adjustments to each channel, click ok to immediately change the blending mode to color.
As a final touch, you may choose to add even a bit more contrast. It is surprising just how much contrast a cross processing layer will pull out of your image.

You have now created a fine cross processed digital image.
Visitor Comments
Deke | March 12, 2008 10:03am
I am using PS 7. Where can I find curves adjustment layer from the layers palette?
I would like to create a fine cross processed digital image.
ev | March 12, 2008 18:11pm
looks cool, and you've helped me to make sense of the "curves" tool,
cheers.
dave | March 13, 2008 03:00am
Great tutorial, for someone who is new to 'curves' it is easy to follow. Cross-processing is so cool!
Anthea | March 13, 2008 03:24am
Nice image! Christmas Cove? Boothbay?
benshead | March 13, 2008 11:36am
deseo que si es posible, se me comuniquen todos los correos y noticias, en castellano, de lo contrario no me entero de nada, gracias
jose maria | March 13, 2008 13:14pm
Nice tutorial!
if you like this tut, you might be interested in this one as well: http://veerle.duoh.com/blog/comments/photoshop_vintage_effect/ciao
koka
Koka | March 14, 2008 09:17am
Neat. It would be cool to show the before/after next to each other (or use a javascript rollover to switch them out).
Tofudisan | March 14, 2008 11:49am
it's ok
parth | March 18, 2008 11:23am
Awesome! I just tried it on some video footage and it looks great!
zelophoto.com | March 18, 2008 12:41pm
ooooooooohhhh, I just tried it on some Super8 movie film footage I shot in NYC this past October and it looks super cool. Thanks again and again!
zelophoto.com | March 18, 2008 12:56pm
Once you find a few of these settings that you like you can save them as presets.
unfocusedbrain.com | March 21, 2008 16:14pm
Wicked cool.
Alan Hogan | March 27, 2008 13:15pm
hi, buddy
you did wery good work, and give us more
such a work to improve our photography. thanks
dipen | March 29, 2008 02:27am
i got it to work. But why and what do you do to the first adjustment layer? Also dafter clicking OK to second adjustment layer did you then go to layers palette and adjust the blend mode from normal to colour?
Anthony Bianco | April 02, 2008 13:36pm
Hi! I like this tutorial and the effect too :) Could You tell the input and output values for the curve You used? or export the curve and share it with us as a basic starting point :)
Thanks in advance and have fun!
Adam | April 21, 2008 06:25am
@ev I don't think PS 7 has curves as adjustment layers (but it will have curves, you just need to work on a copy of your image since it's non-reversible). Look up 'curves' in PS Help (press F1) to find out where they are hiding in PS 7.
jhm | April 24, 2008 14:13pm
Hi there,
i am using adobe photoshop CS3 my problem is that, the images i was trying add up on my work space didn't appear. How am i goin' to solve this problem?
Thank you for the response!^^
cheryl | May 07, 2008 01:11am
Leave us a comment

- Moving Around When Zoomed In - May 09
- Filling Used Pixels - May 08
- Match Zoom - May 07
- Eyedropper Shortcuts - May 06
- Letter Spacing - May 05


Digg This!
Del.icio.us
Blinklist

Photoshop
Illustrator
Indesign
Dreamweaver
Photography
Flash
After Effects
Lightroom