Creating and distributing documents that require signatures is one of many timesaving uses for PDF files. Digitally signed PDFs are considered just as valid as manually signed originals by most companies and government agencies. Creating and using digitally signed PDFs saves the time, energy, and expense of sending signed documents back and forth—and many people can sign the same document.
Here’s how to create, customize, and use a digitally signed PDF to submit W-9 Federal tax forms to all your paying clients. If like me, you hate paperwork, you’ll love this method of distributing these forms and may find many similar ways to use your digital signature.
Step 1 Download and Open the W-9 Form
Download the W-9 form from www.irs.gov/pub/irs-pdf/fw9.pdf. Open this form in Acrobat 8.
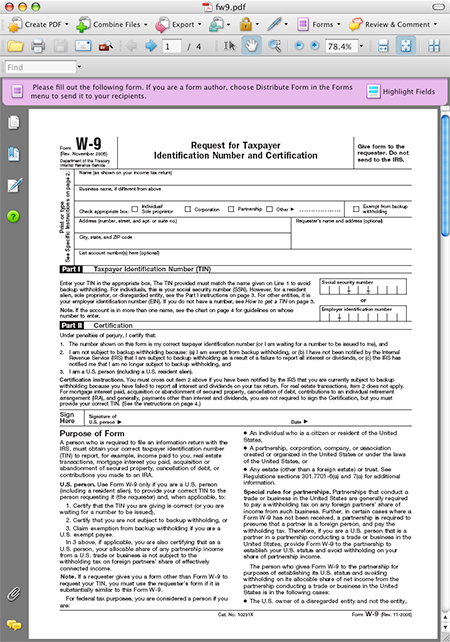
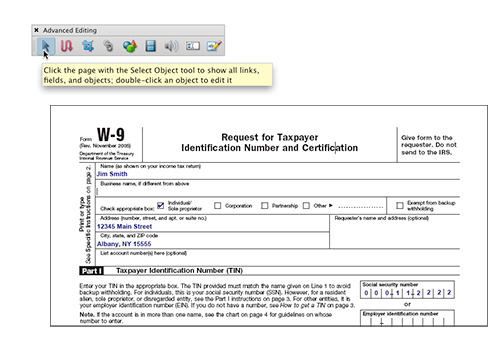
STEP 2 Fill Out the W-9 form
The W-9 is an interactive PDF form, so all you need do is click in the Name field to begin typing in the appropriate information. Tab through to access the needed fields. Note: You can view all the form fields by simply activating the Tools>Advanced Editing>Select Object tool.
STEP 3 Create Image for Digital Signature
You can use a graphic image along with your digital signature, so select an image you’d like to use as your PDF signature image. Save it from Photoshop as a PDF file. It should be approximately 150×200 pixels at 100 ppi (high quality). A zoomed-in headshot is appropriate for use here because the image will appear in a small area onscreen (and in a printout).
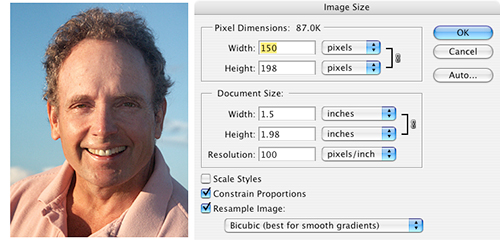
CREDIT: TAZ TALLY
STEP 4 Assign Graphic to Digital Signature
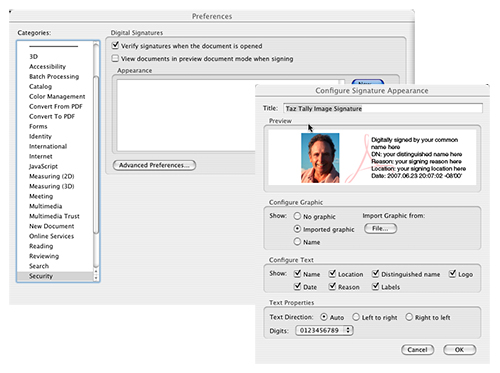
Choose Acrobat>Application>Preferences (PC: Edit>Preferences) and scroll down to Security to access the Digital Signatures dialog. Click on the New button to open the Configure Signature Appearance dialog and fill in the Title field with your name followed by “Image Signature.” In the Configure Graphic section, check the Imported Graphic button and under Configure Text, click on all fields. For Text Properties, click Auto. Now click the Import Graphic from File button, locate the PDF image you created in Step 3, and click OK.
STEP 5 Create a Text-Only Digital Signature
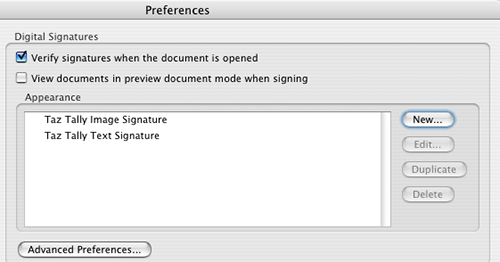
Back in the Digital Signatures dialog, click the Duplicate button to duplicate the image-based signature you just created. Select the copy of the signature and click the Edit button. In the Configure Signature Appearance dialog, change the Title to: “[your name] Text Signature,” change the Configure Graphic option to No Graphic, and then click OK to create your second signature. Now you have a choice of using either an image or a text-only signature when you digitally “sign” your PDF documents.
STEP 6 Assign Advanced Digital Signature Preferences
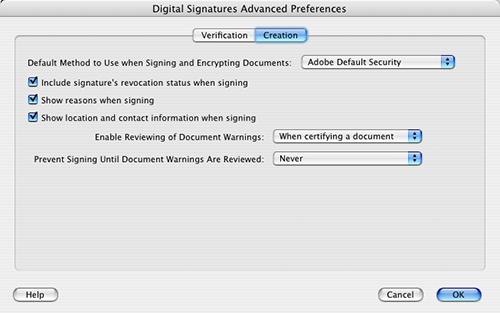
In the Digital Signatures dialog showing the list of your two newly created digital signatures, click Advanced Preferences. Read through to see your Verification options (we used the default values). Now click the Creation tab and read the options. As you can see, we opted to turn on all options. These fields will then appear in your digital signature dialog when you sign a document. Click OK twice to close these dialogs.
STEP 7 Select a Signing Method
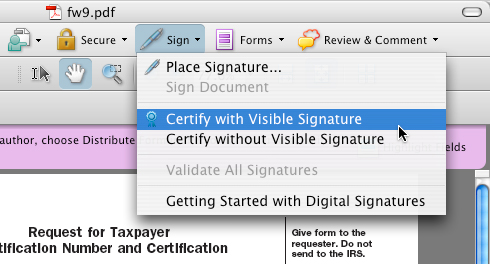
Click on the Sign tool and choose Certify with Visible Signature. You may also select Place Signature. The difference is that the Certify option allows you to use a third-party Adobe Digital ID (see Step 8), and also lets you control/prevent any changes from occurring to the document after you’ve signed and certified the document. If you choose the Without Visible Signature option, your signature will still be present and viewable in the Signature panel (see Step 13), but there will be no visible signature on the actual document.
STEP 8 Select/Acquire a Digital ID
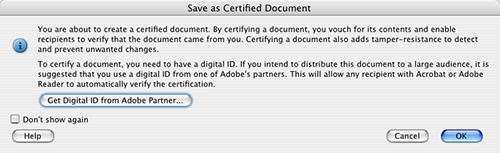
If you’ve selected Certify with Visible Signature, the Save as Certified Document dialog appears. Read it, and if decide if you’d like to Get Digital ID from Adobe Partner, click this button. This will take you to a Digital ID website where you can acquire a third-party digital ID. This isn’t necessary for this example of signing our W-9 form; however, having and using a third-party digital ID may be useful if you’re distributing signed documents to a group of people who may not know you personally.
STEP 9 Place your Digital Signature
Once you’ve selected your signing tool, zoom in on the area where you’d like to place your digital signature. If possible, choose an area with enough white space to allow your digital signature image and its related copy to be clearly visible. In the W-9 form, click-and-drag to create a digital signature area on the right side of the signing area on page 1 of the W-9 form.

STEP 10 Configure Your Digital Signature
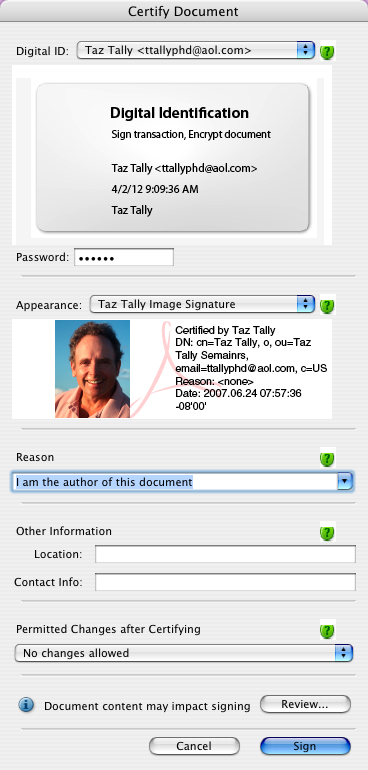
When you’ve completed your signature placement, the Certify Document dialog appears (or the Sign Document dialog if you’ve elected the Place Signature option instead). Complete the dialog as follows: Your Digital ID—select a third-party ID if you acquired one in Step 8 or simply use your default internal Digital ID; Password—use the password that is already associated with the Digital ID that you selected; Appearance—your name and image signature; Reason—I am the author…; Other Information—fill in as you like; Permitted Changes after Certifying—No Changes Allowed. When you’re finished, click the Sign button.
STEP 11 Name and Save
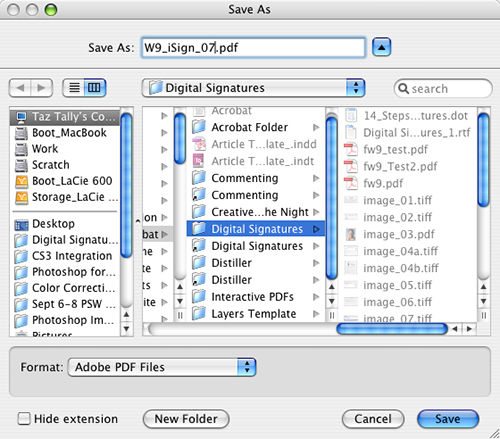
Once you click the Sign button, you’ll be asked to create a new signed version of your PDF document. I used “W-9_iSign_07” to name the document as a reminder that this is an image- rather than a simple text-signature document.
STEP 12 View Signature
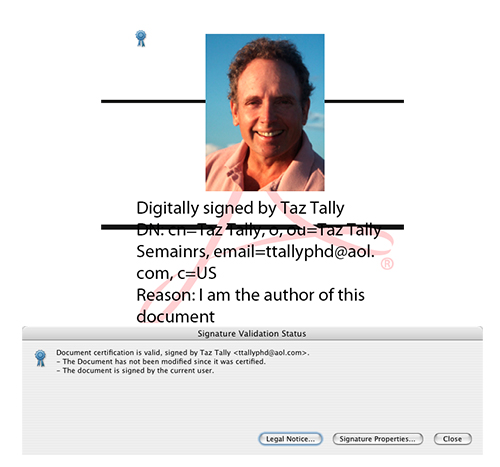
Zoom in on your new digital signature on your W-9 form. You’ll see your PDF image as well as the information, including the date of your signature. You can also click on your digital image to access the Signature Validation Status dialog. Then click on the button to activate the Signature Properties tabbed dialog.
STEP 13 View Signature Panel
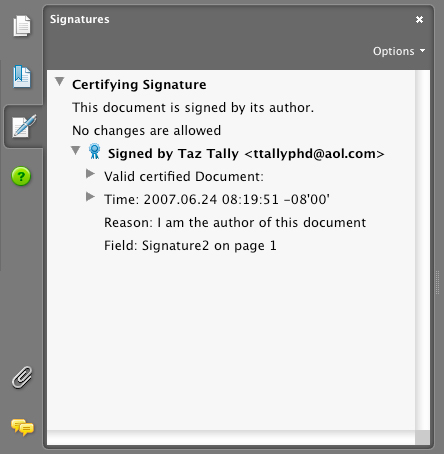
In Acrobat, you can click on the Signature panel icon (located on the left side of the Acrobat window) to view information about the location and content of you signature. This is a quick way to locate any digital signatures in a document and is handy when viewing an especially long document with signatures. And, if many people have signed the document, all their signatures will appear in this panel.
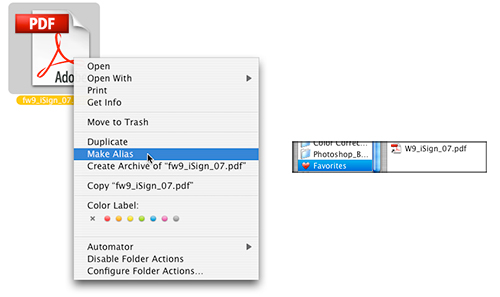
STEP 14 Create Alias/Shortcut of Your Signed W-9
Now that you’ve created a digitally signed W-9 tax form, create an Alias (PC: Shortcut) and place this in an easily accessible place, such as your Favorites folder. Now, any time one of your clients wants you to send them a signed W-9, you can quickly access and attach this W-9 PDF to an email. Note: If you want to add further protection to your signed W-9 PDF, you can create a security envelope (Secure>Create Security Envelope).