Using Matte in Adobe After Effects

One of the easiest ways to control the transparency of elements in After Effects is to make use of a matte; however, mattes come in various flavors—track mattes, garbage mattes, layer blend modes, and alpha and luma mattes, among others. Using just a few of these, and some sneaky techniques, we can create a fun intro to a TV program (the fictitious Space Angels) and a cool transition from the logo to the first scene of the action.
The specs for this project are an NTSC square pixel composition (720×540), 29.97 frames per second, 8 seconds long, with a background color of black.
For a QuickTime preview of this project, click here.
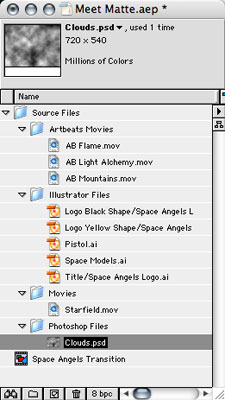
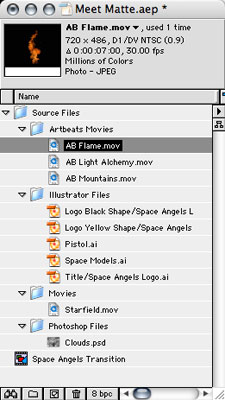
STEP 1: Import Vector Graphic Elements
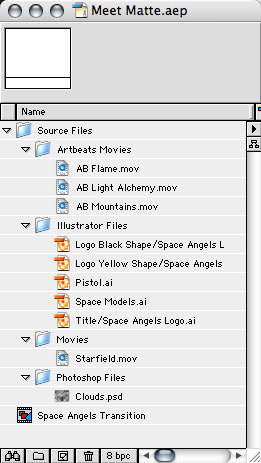
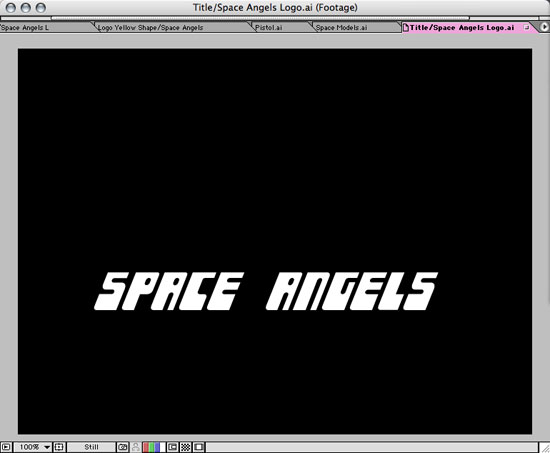
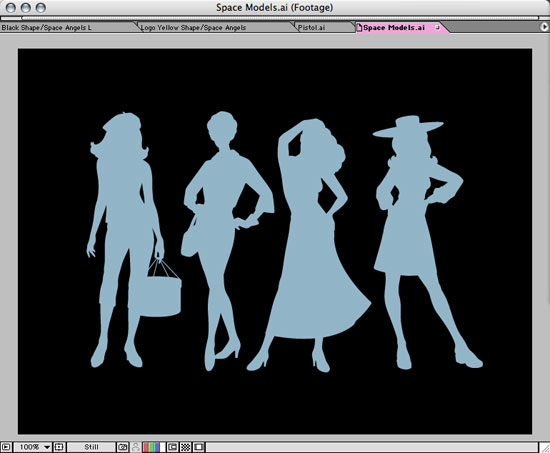
First, assemble the elements to use in the titles. We’re looking for a mix of video, vector graphics, and an icon that’s central to the logo that can be used for the jump from title to action. In this case, we’ve started with a selection of Illustrator graphics: the words "Space Angels," silhouette outlines of the "Angels" (with a nod of thanks to House Industries), yellow outer shapes to sit behind the title, a smaller black shape that will go above it later, and finally a pistol logo that’s perfect for the transition later.
STEP 2: Import Video Elements
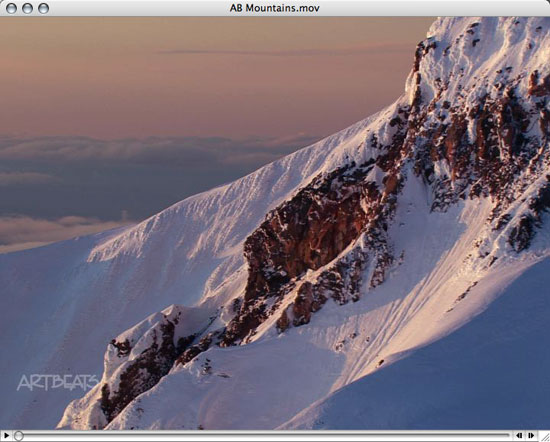
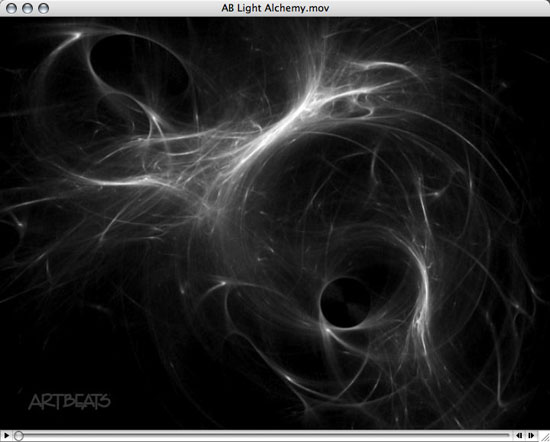
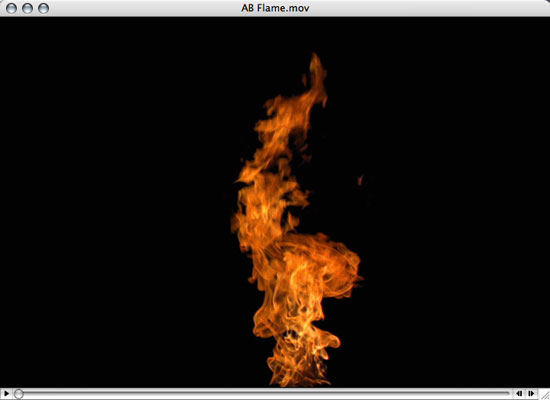
For video, we’re using a small selection from Artbeats Video Library: one of their free clips of a single flame, a cool animated starfield for the background, some swirls from the Light Alchemy collection, and a really nice fly-by of snowy mountains to use as the action clip we transition to. Also, we created a simple Photoshop document (size 720×540 with square pixels) and applied the Clouds filter (Filter>Render>Clouds) to it. All of these elements should now be imported into the AE project via File>Import.

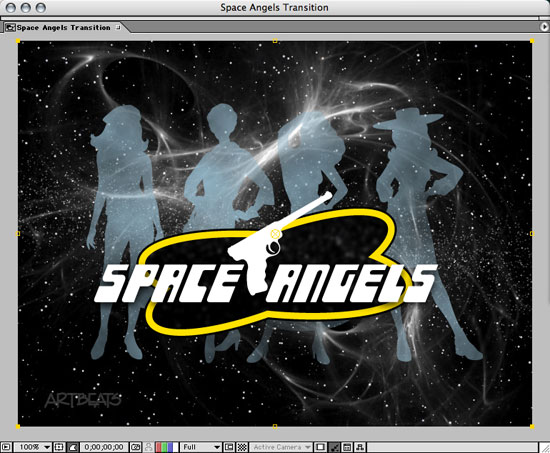
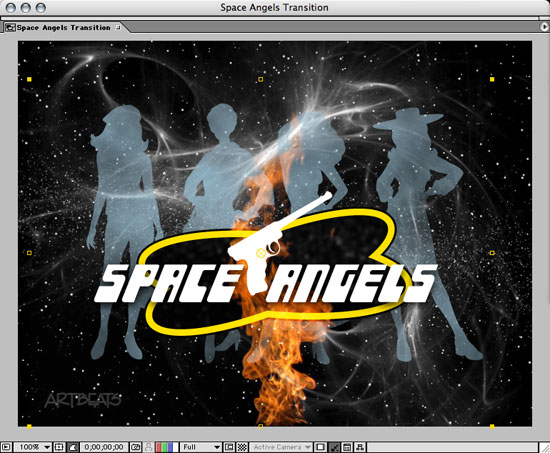
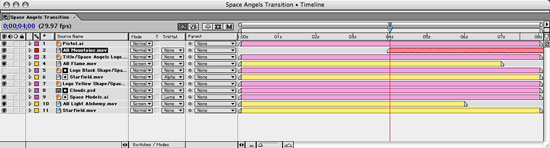
STEP 3: Organize Layers in Comp; Check Stacking Order
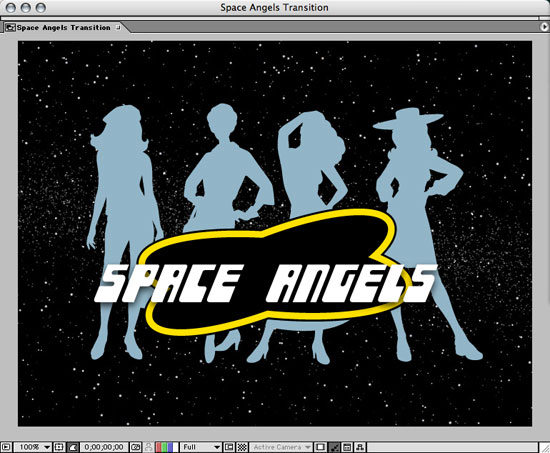
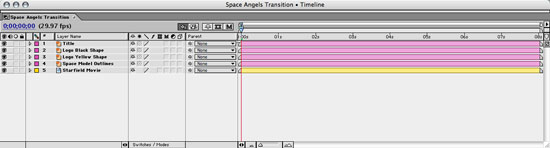
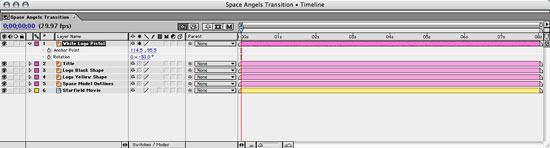
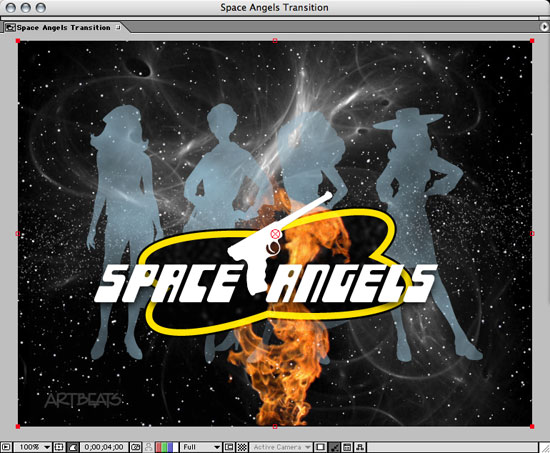
With your 8-second Comp open, drag the following elements from the Project window into the Timeline, and arrange them as shown (from the bottom up), making sure the Current Time Indicator (CTI) is at 0 seconds: Starfield Movie, Space Model Outlines (Angels’ silhouettes), Logo Yellow Shape (outer), Logo Black Shape (inner), and the Space Angels Title at the top. Your composition should look something like this.
STEP 4: Add Icon; Scale and Move
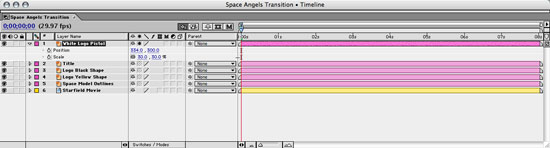
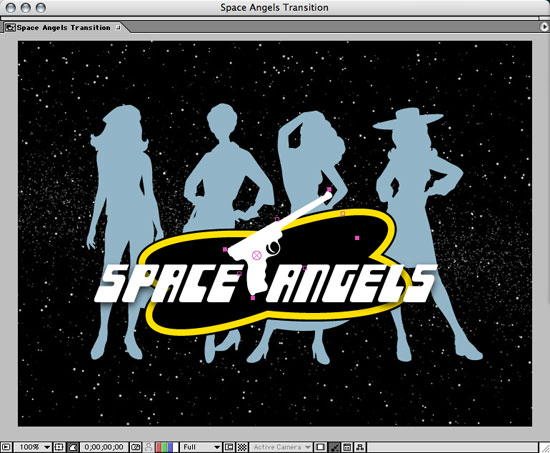
Finally, drop the White Logo Pistol into the Comp. Here, it comes in too large, so hit S on the keyboard to reveal the layer’s Scale property in the Timeline. Drag on either value to scale the logo down (or up) to your preferred size (we used 30%). Now, drag the pistol itself in the Comp window to the desired position, somewhere above and between the two title words.

STEP 5: Rotate Icon; Adjust Anchor Point
Now hit R and drag on the Rotation value to get the angle correct (–30° in this case). You probably notice that the object’s anchor point isn’t on the handle where it needs to be. Not only does this affect rotation but also more importantly, scale for later on when we zoom the pistol up to fill the screen and reveal the action clip. To fix this, choose the Pan Behind/Anchor Point tool from the Tools palette, and drag the anchor point (in the Comp window) to the desired location.
STEP 6: Duplicate Stars; Blur; Change Layer Order
The first effect we want to create is to have the starfield visible in the black area of the logo, but blurred out of focus. Select the Starfield Movie layer in the Timeline, and press Command-D (PC: Control-D) to duplicate it. Now go to Effect>Blur & Sharpen>Gaussian Blur, and adjust the value to around 5 pixels. Drag the layer up in the Timeline until it sits directly below the Logo Black Shape layer (between it and the Logo Yellow Shape layer). The stacking order here is very important when creating mattes.
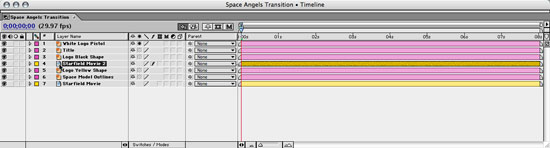

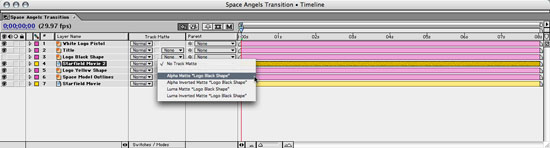
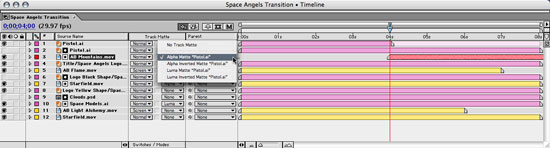
STEP 7: Switches/Modes; Create Alpha Matte
In the Timeline, click the Switches/Modes button at the bottom to view the Mode and Track Matte columns. Next to the blurred Starfield Movie 2 layer, choose the pop-up menu in the Track Matte column, and select Alpha Matte "Logo Black Shape." The Logo Black Shape layer now becomes a matte for the Starfield Movie 2 layer. You can now see blurred stars only in the logo and the rest of the Comp is visible again! Hit 0 on the keypad to perform a RAM preview and see the motion.
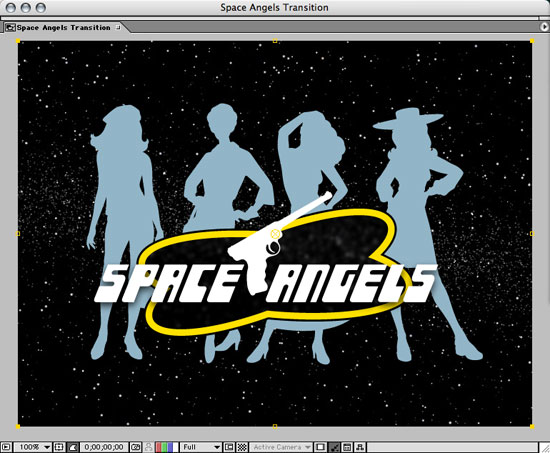
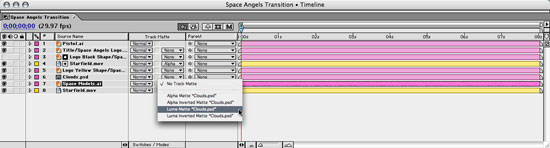
STEP 8: Add Clouds File; Create Luma Matte
Let’s now make the Angels themselves transparent, but not overall. Drag the Clouds.psd file from the Project window into the Timeline (at 0 seconds), then drag it to sit directly above the Angels’ silhouettes layer (between it and the Logo Yellow Shape layer). Once again, under the Track Matte column, select the pop-up next to the Angels silhouettes, and this time choose Luma Matte "Clouds.psd." AE simply uses the grayscale values in the PSD to create variable transparency in the silhouettes.
STEP 9: Add Swirls; Use Blend Mode
Now, let’s add a bit of astral aura to the scene! Drag the swirls (AB Light Alchemy) movie into the Timeline (at 0 seconds), and make sure it sits directly above the background Starfield layer by dragging it down in the Timeline. The swirls are white on black, and we want to quickly remove the black pixels so we can see the stars and swirls together. Under the Mode column in the Timeline for the swirls layer, simply choose Screen, and voilà! Do a RAM preview to see the titles so far.
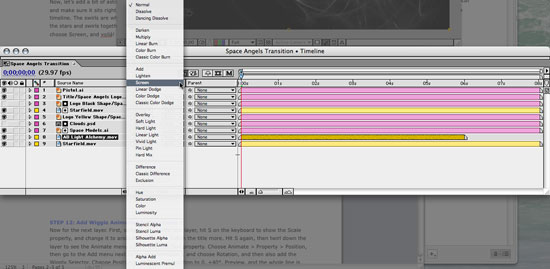
STEP 10: Add Flame; Use Blend Mode
Next, drag the flame clip into the Timeline at 0 seconds, and make sure it sits just below the main Space Angels title, but above the Logo Black Shape layer. Here, the flame clip is smaller than the Comp, so we’ve moved it down into position. Once again, choose Screen as the blend mode for this layer, and the flame is nicely composited with everything else. If you have an Artbeats clip of flames going across the entire bottom edge, this would look great here!
STEP 11: Add Action Clip; Check Layer Order
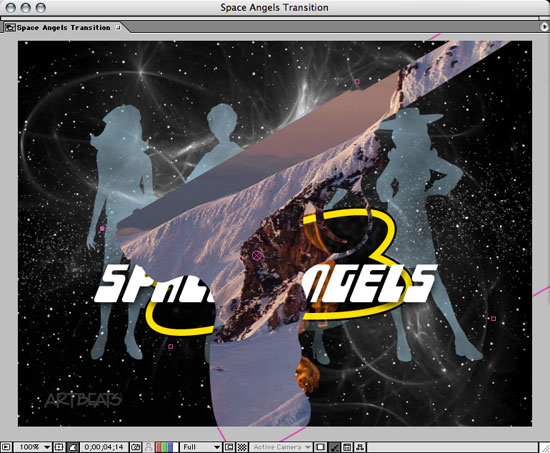
Now for the transition to the action clip: We want everything we’ve done so far to play for around 4 seconds, then between 4 and 5 seconds, our pistol zooms up to reveal the action clip (mountains) as it grows and becomes full screen. Let’s bring the mountain movie clip into the Timeline by dragging it from the Project window, and make sure it’s the second layer down, directly beneath the pistol and above everything else. Move the CTI to 4 seconds, then hit left bracket ([) on the keyboard to make the clipstart there.
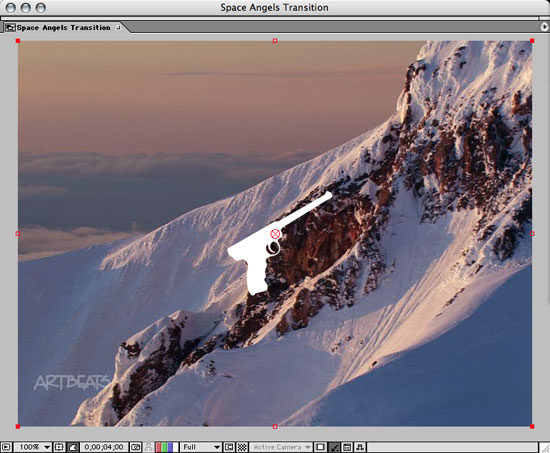
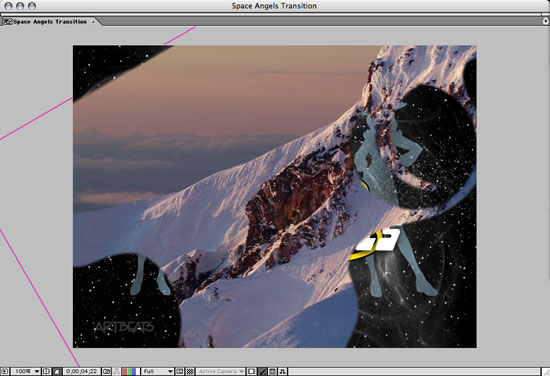
STEP 12: Duplicate Icon and Trim; Create Alpha Matte
Because we want the white pistol icon to be visible for 4 seconds, we can’t make it an alpha matte right now. Instead, select the pistol layer and duplicate it (Command-D [PC: Control-D]), then hit Option-] (PC: Alt-]) to trim that layer to stop at 4 seconds. The top, duplicate one is now the main white one, the second layer will be our matte. Under the Track Matte column for the Mountains clip, choose Alpha Matte "Pistol.ai." If you scrub the Timeline now, the mountain clip is visible through the pistol after 4 seconds!
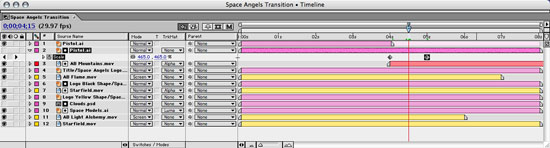
STEP 13: Animate Zoom
With the second pistol layer selected (the one which is matting the mountains), press S to reveal its Scale property in the Timeline. With the CTI still at 4 seconds, click the Stopwatch next to the word Scale to add a keyframe at the current size (in this case, 30%). Move the CTI to 5 seconds, and drag the scale value up until the pistol scales off screen, and the entire mountains clip is visible (here it’s 900%). Scrub the Timeline back to about 4s15f—the edge of the pistol is very fuzzy. This needs to be fixed!
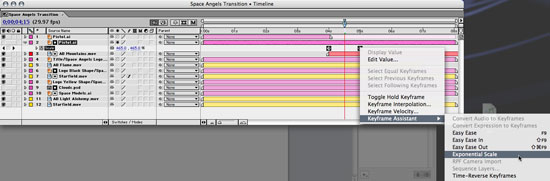
STEP 14: Continuous Rasterization; Exponential Scale
Click Switches/Modes back to Switches, and then click the small dotted symbol under the second column next to the pistol matte layer. This tells AE to keep the full quality of the vector shape at any size, and fixes the issue perfectly. One more thing to finish this up: Select both Scale keyframes for the layer, Control-click (PC: Right-click) on one of them, and choose Keyframe Assistant>Exponential Scale. This adds extra keyframes to make the scale appear a consistent speed, and rounds out the animation perfectly! Everyone, I believe you know Matte. Enjoy!