
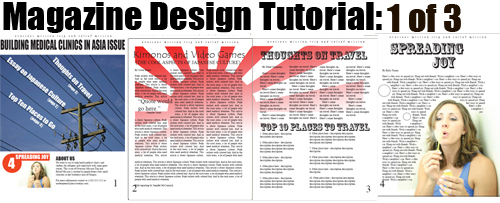
As faculty advisor to a student newspaper, I’ve seen what problems university students often run into and concepts that are most useful to them when laying out a publication in InDesign. In my opinion, Adobe InDesign is the best layout software available. If you have Adobe InDesign CS2 or later (or an earlier version, though some steps may be slightly different), you can follow along with this three-part tutorial in creating a small four-page magazine, in order to learn a few techniques and concepts along the way.
Step 1
Open InDesign and go to File>New or click the Create New File icon on the welcome screen. Set the settings shown here, all the default settings, except set it to 4 pages.

Step 2
Let’s set up the master pages. That way we can add a header and page numbers automatically. Double-click on the A-Master icon on the top of the Pages pull-out palette to open up the master pages.

Step 3
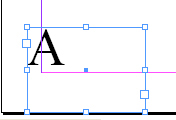
In the lower-left hand corner of the left master page, click-and-drag with the Text tool to drag out a text box for the page number.

Step 4
Go to Type>Insert Special Character> Auto Page Number. [if you are using InDesign CS3 the menu is a bit different: Type> Insert Special Character >Markers>Current Page Number.]

Step 5
This will insert an automated page number so you don’t have to number each page. Change the size (and style if you want) of the font to an appropriate one for you publication.
[Note: Additionally, you could also place text (like the word ‘page’ or ‘#’ symbol) in front of the page number and it would be continued throughout all pages using the master page template.]
Step 6
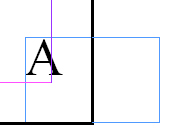
Select the Selection tool. Hold down Option (PC: Alt) and click-and-drag the text box that has the automatic page number in it over to the right page to create another instance of the Auto Page Number. I placed the text box on the right side page on the lower right hand corner.
{module:ads/large_rectangle}
Step 7
If you put the text boxes for the page numbers in the same locations as I chose to, it should look something like this.

Step 8
Page numbers are not the only objects to put onto the master pages. And all the objects don’t have to be automatically updated objects, either. You can add photos, text, or shapes and they’ll be on every page. For this tutorial, add just a simple title at the top of each page by clicking-and-dragging out a text box along the top.
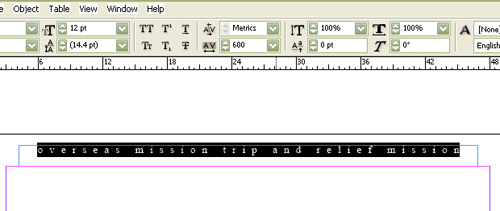
Step 9
Open the Paragraph palette and click the center justify icon to center the text after highlighting it. Up in the Control palette, change the tracking to 600 to spread out the spacing of the text to spread out the title. The Tracking setting icon is an uppercase AV with directional arrows underneath it.
Step 10
Open Adobe Illustrator, create a New Document and go to File>Place to place the japanese_flag.gif file.

Step 11
After clicking on the placed file with a Selection tool, click on the down arrow next to Live Trace up on the Control palette to pull down the options. Click on Tracing Options. Change the settings to the ones shown here; pretty much a basic black and white trace. Click Trace to apply the trace.

Step 12
Press Expand up on the Control palette.

Step 13
Next, Deselect the image. Then, using the Direct Selection tool, click on the white areas of the placed image. Press Delete to remove the white areas. Be sure you are using the Direct Selection tool, the white arrowed one, and not the Selection tool, the black arrowed one, which would select then entire object instead of the clicked object (the white area) of the greater expanded object.

Step 14
With the Direct Selection tool, click on the black object and click on the black and white gradient in the Swatches palette (Windows>Swatches).

Step 15
Change the direction of the gradient to a diagonal slant by selecting the Gradient tool and then clicking-and-dragging form the bottom right to the upper left of the object.

Step 16
Next, click-and-drag a color from the Swatches palette to one end of the gradient on the Gradient palette (click on the gradient tab if the palette isn’t open). Click-and-drag another color to the opposite side of the gradient slider to add the other end of the gradient. I changed this one to red and white to keep with the Japanese theme.

Step 17
The object should look something like this. For the publication, we want more white area, so use the Gradient palette slider to have more white area.

Save it as an Illustrator.ai file for the next part of this tutorial. Save the InDesign file as well. With the second part, we’ll use this as a nice background for two pages of the publication. We’ll also add some new graphics and unique title text and complete the publication with the third part.
