
Production Premium Tutorial on Greenscreen and Virtual Sets
The chroma key wall has come to be used for much more than just the weather. With improvements in both keying technology and cameras, it’s possible to get professional results on tighter budgets. How you key will vary on the footage you use, but Production Premium offers an integrated solution. Let’s explore how Premiere Pro, Photoshop, and After Effects can work together to take advantage of great keying.
1 [SHOOT YOUR VIDEO RIGHT]
Cameras often have auto features turned on that can make keying much more difficult. Turn off auto-exposure, auto-white balance, and auto-focus. If any of these are left on, this means the green you’re trying to key will constantly change as your model moves. While you’re in the setup menu, be sure to turn off Sharpening. Keep your model and your camera as far away from the screen as possible. If your camera shoots progressive, take advantage of it. Fields definitely get in the way of a good key. If possible avoid DV and HDV.

2 [CAPTURE VIDEO WITH PREMIERE PRO]
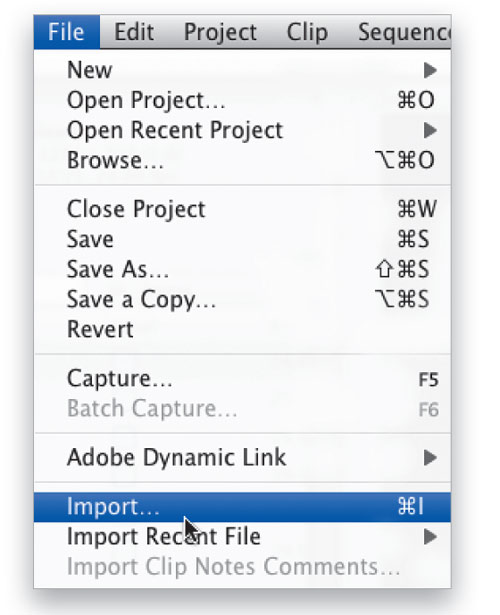
You’ll need to get the video into the Creative Suite in order to work with it. With Adobe Creative Suite 3 Production Premium, you have Adobe Premiere Pro for digitizing or importing video. If working with tape-based sources, choose File>Capture and use your deck or camera to load footage. If working with tapeless sources (such as P2 Cards or XDCAM) simply choose File>Import and navigate to the clips on your hard drive. It’s a good idea to transfer the media first to an edit-grade hard drive.
3 [MAKE YOUR ESSENTIAL EDITS]
First, you’ll want to edit your clips in Premiere. Simply put, keying takes time—time to set it up and render. You don’t want to bother keying footage you don’t need. Create a new sequence and get it edited in a rough form. It’s a good idea to leave one second of pad on both ends of the shots you want to key (this is called “laving handles”). This pad gives you overlap that you’ll use for transitions (wipes and dissolves). You’ll add these after you’ve created the composited image.
4 [GO TO AFTER EFFECTS WITH DYNAMIC LINK]
Adobe Dynamic Link works across many of the applications in the Adobe Creative Suite Production Premium. It can significantly speed up your workflow as it provides the ability to create dynamic links between applications, without a need for exporting or rendering. In the Project window, select the sequence you want to share and choose Edit>Copy. Switch to After Effects and choose Edit>Paste. A new composition that matches the settings of your Premiere sequence is created and the associated media is imported into After Effects. Double-click the new sequence to open it.

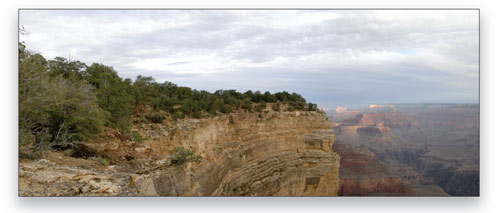
5 [STEP AWAY AND MAKE A BACKDROP]
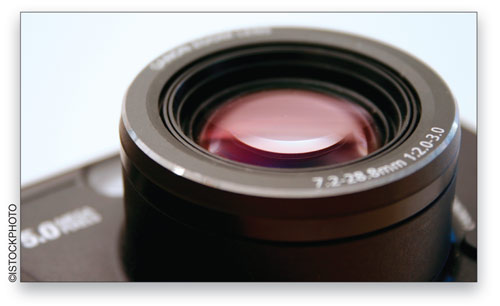
In order to key, you’ll need a backdrop. This can be a stock background, a 3D rendering, or a photograph. One of our favorite techniques is to use a panoramic photo. This gives you a lot of options as you can easily resize and reposition the backdrop for different framings. To create a pano, use a digital still camera. Orient the camera for portrait, then shoot three to five photographs. Be sure each shot overlaps the previous shot by 10–20% so the photos can be easily stitched together. Load the photos onto your computer.
6 [LOCATE IMAGES WITH ADOBE BRIDGE]
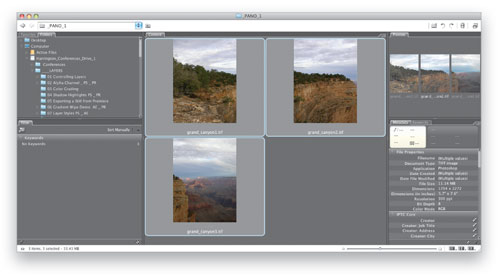
The easiest way to browse your photos is with Adobe Bridge. This file navigation tool allows you to visually browse your media, which comes in handy when looking for your background images. If needed, you can even rotate images in Bridge. Once you’ve found and selected your panoramic images, choose Tools>Photoshop>Photomerge. If it’s not running already, Photoshop will launch and become the active application. The Photomerge dialog presents itself and awaits your input.
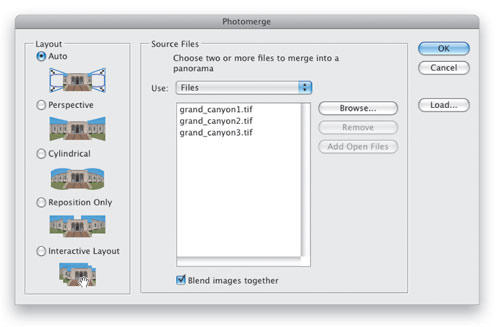
7 [RUN THE PHOTOMERGE COMMAND]
The files you selected in Bridge are automatically loaded in the Use: Files list. There are several layout options, but we’ve found that Auto works very well most of the time. Be sure to check the box next to Blend Images Together. Click OK and be patient—each image has to open. Photoshop will attempt to automatically align your images and use layer masks to blend them together seamlessly.
8 [SAVE A PREPPED IMAGE]
Once the image is built, you should optimize it for a video workflow. If you’re happy with the Photomerge, you’ll likely no longer need layers. Choose Layer>Flatten Image to reduce the image to a flattened file. This will reduce render times and RAM overhead for the After Effects Composition. Crop the image to a clean rectangular shape using the Crop tool (C). Save the file as a TIFF image to your project folder.
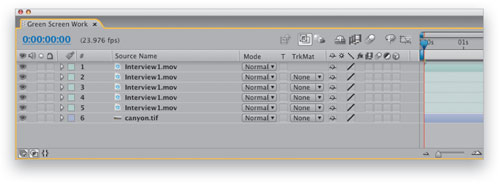
9 [IMPORT AND STACK]
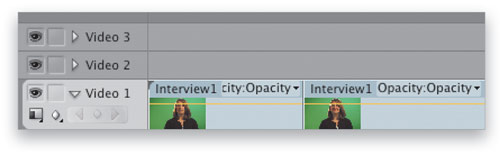
Unfortunately, there’s no Dynamic Link between Photoshop and After Effects (but the workflow is still easy). Switch back to After Effects and double-click in an empty area of the Project panel (or choose File>Import>File). Navigate to the file just created with Photomerge, select it, and click Open. Drag this imported file to the bottommost layer in the open composition (placing it below your video footage). Now turn to the After Effects column on page 90 for instructions on keying your footage using Keylight, a powerful chroma keying plug-in from The Foundry. Then return here to composite your background with your keyed video.
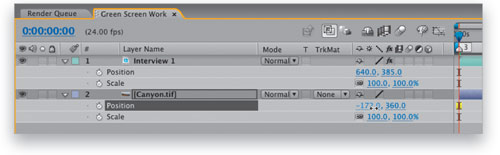
10 [Tweak Position]
Once you’ve nailed the key, you can tweak the background. The advantage with an oversized background is that you can position it to taste. This way, as your shot composition changes (such as a medium shot to close-up), you can change the size and position of the background. This also allows for a background to be reused on multiple interviews with greater flexibility. To access position controls, simply select the layer and press the shortcut key P. You can then tweak the layer’s X Y Position to suit. To use Scale, just press the shortcut key S.
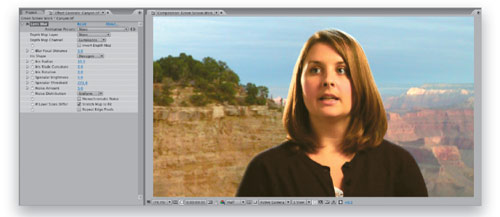
11 [Tweak Focus]
Chances are that your backdrop is a little too clear. Most photographers make it a point to take pictures in focus. But if this scene were really being filmed with a video camera, the backdrop would be out of focus due to depth of field. You can tweak this using a Gaussian or Lens Blur effect (both under Effect>Blur & Sharpen) to soften the background and simulate depth of field. Gaussian Blur is faster than Lens Blur if you’re in a hurry, but Lens Blur offers some realistic settings you can tweak, such as Grain and Highlights.
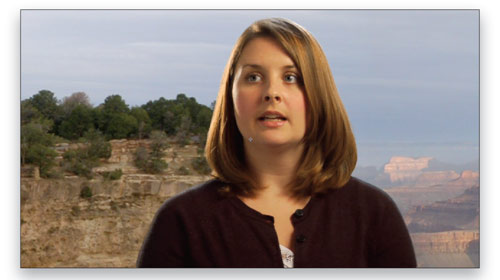
12 [Tweak Color Balance]
Your foreground and background elements will likely not match from a color balance point of view, but it’s easy to tweak your colors. One effective way is to apply an Adjustment Layer (Layer>New>Adjustment Layer) with a Photo Filter (Effect>Color Correction>Photo Filter), which offers useful presets for warming or cooling shots. Additionally, Keylight offers color-correction controls to match foreground and background elements. Paying close attention to color will help make the composite more believable. Additionally, you can use any other Color Correction effects in After Effects to refine the shot. The professional workflow is to key the shot first, then tweak color and exposure.
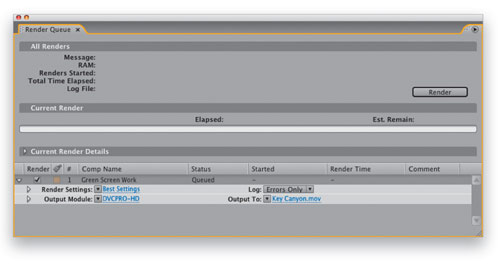
13 [Bake It]
It’s generally a good idea to invoke a full-quality RAM preview first to make sure the key works well. Simply mark out a work area of a few seconds and check the key. When satisfied with your composition, you’ll need to render it. This can be done via the After Effects Render Queue (Composition>Add to Render Queue), which allows you to create QuickTime, AVI, or FLV files. If further editing is needed, simply invoke Dynamic Link (copy-and-paste) to return the composite to Premiere Pro.
All images ©RHED Pixel, unless otherwise noted
