The Gradient tool is one of the more useful tools in Photoshop and it can be employed for a variety of tasks, ranging from photographic color correction and masking to collage, graphic design, and illustration. In this issue, we’ll explore three different uses for the Gradient tool. First, we’ll look at how to use a gradient mask in an adjustment layer to create the Photoshop equivalent of a graduated neutral density filter. Next, we’ll move on to using gradients for collaging two images together and reveal how to combine the soft transitions of a gradient with a precise, hard-edged mask. Finally, we’ll wrap up with a photo illustration project and a technique for using gradients to create a beam of light.

|
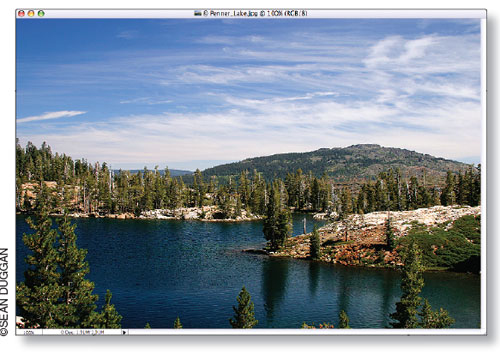
| STEP 1 | Open the Penner Lake Image |
| Photographers have long used gradients on actual glass filters to balance the exposure between a bright sky and a darker foreground. This can also be done in Photoshop by using an adjustment layer and then modifying the layer mask with the Gradient tool. If you want to follow along, download the Penner Lake image and open it in Photoshop. Penner Lake is located at about 7,000′ in the backcountry of the Sierra Nevada Mountains, not far from where I live. |
|
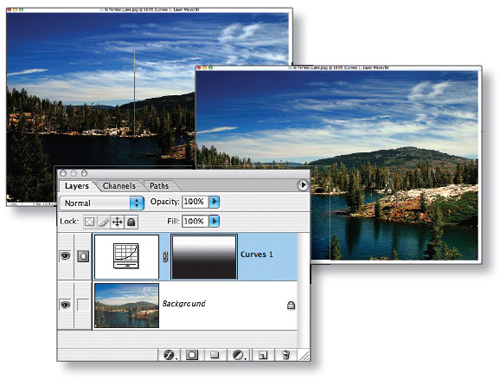
| STEP 2 | Add a Curves Adjustment Layer to Darken the Sky |
| Add a Curves adjustment layer by clicking on the Create New Adjustment Layer icon at the bottom of the Layers palette and choosing Curves from the pop-up menu. When the Curves dialog opens, click in the middle of the curve and drag downward. Don’t worry if the lake and mountains get too dark; we’ll take care of that with the gradient mask in the next step. Once you’re satisfied with the darkening effect on the sky, click the OK button to finalize the adjustment. |
|
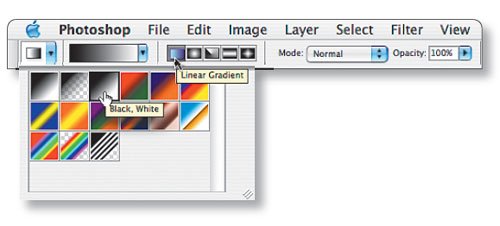
| STEP 3 | Set Gradient Tool Options |
| Choose the Gradient tool (G) from the Toolbox. In the Options Bar for the tool, click the triangle button next to the gradient thumbnail to open up the Gradient Picker. Click on the third swatch from the left in the top row. This is always black to white. You also want to look at the row of five icons next to the Gradient Picker and make sure that the fi rst one (Linear Gradient) is enabled. Finally, make sure that the Mode is set to Normal and the Opacity to100% and that the Reverse checkbox isn’t checked. |
|
| STEP 4 | Apply the Gradient in the Layer Mask |
| Make sure the Curves adjustment layer is the active layer and place your cursor on the Penner Lake image at the edge of the far shore of the lake. Click-and-hold, press the Shift key, and drag up to about halfway between the horizon and the top of the sky. Let go to apply the gradient (the Shift key here constrains the gradient to a straight vertical line). If you need to redo the gradient, simply start over and any existing gradient will be replaced by the new one. |