Creating Silhouettes in Adobe Illustrator
This tutorial will demonstrate how to create a vector silhouette from a photo using Photoshop plus Illustrator’s Live Trace tool. Knowledge of Photoshop channels will help you work through the steps, but is not required.
1
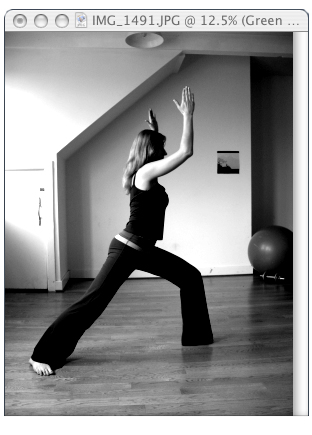
First, select a photograph. A figure shot on a flat white background is ideal, but one with fairly good contrast should work fine. Keep in mind how the figure will look in silhouette. Profiles work well. Try to avoid something with weird angles or extreme foreshortening.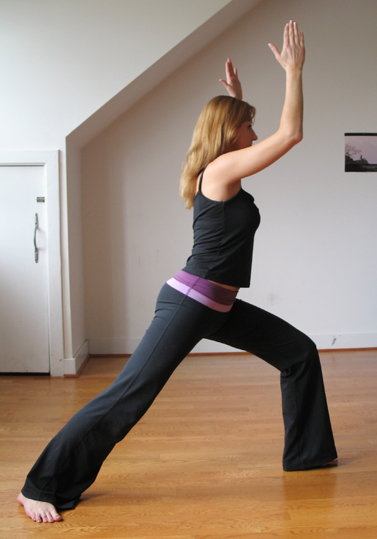
2
In Photoshop, examine the three channels. Look for something with a good amount of contrast, in which the darks of the figure stand out from the background. For this photo, I’ve chosen the green channel.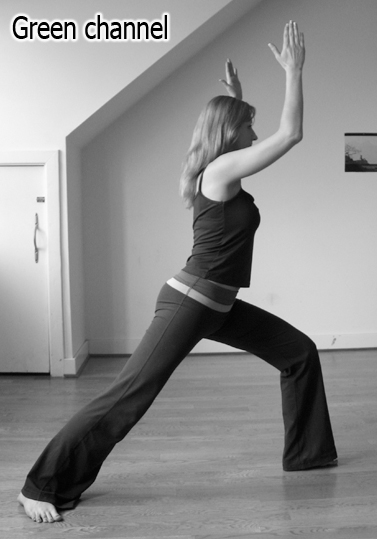
3
Duplicate the channel by dragging its thumbnail to the new channel icon in Photoshop’s Channels palette.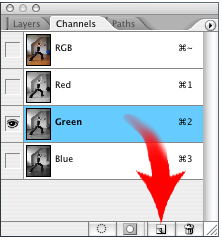
4
Adjust the Levels (Image>Adjust>Levels) on the new, duplicated channel to make the image contrast even more.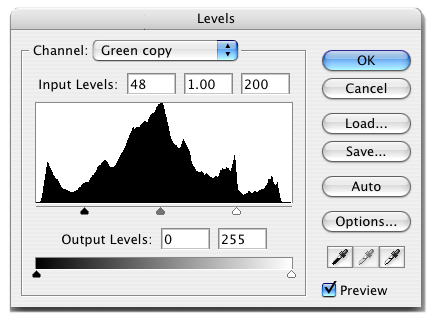
5
Now, using the Dodge tool, set it to affect only the Highlights, and begin dodging the lighter areas.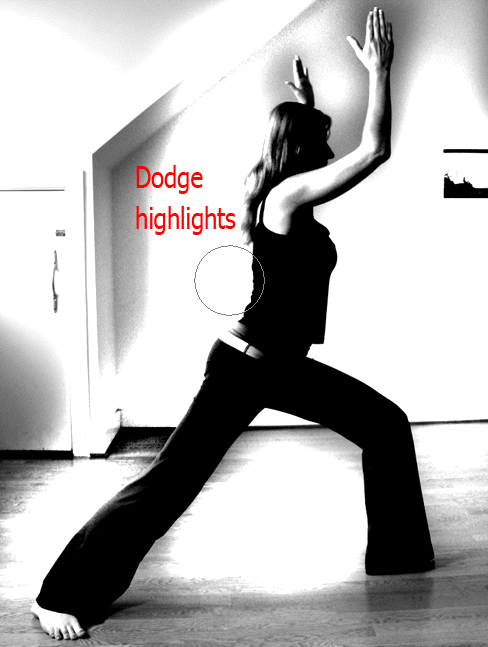 Do the same with the Burn tool, using it to burn the shadows.
6
You may have to paint some of the areas that won’t burn or dodge completely. Here, I’ve filled in the arm with black, then I’ll continue dodging the background.Once you’ve isolated the black silhouetted shape, fill the other outside areas with white.
7
7Select>All, copy and paste into a new layer. You can now flatten the image and save it as a TIFF, or simply save the PSD with the silhouette layer visible. Illustrator can accept most raster file formats as placed images.
8
Go to Illustrator. Choose File>Place and place your newly-saved file. Select it by clicking on it with the black arrow, aka Selection tool, then go to Object>Live Trace>Tracing Options.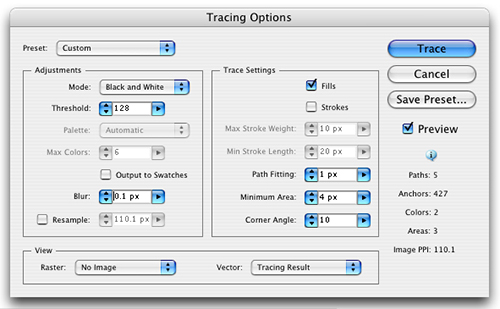
9
In the Tracing Options dialog, click the Preview button. The mode should already be set to Black and White. In the Trace Settings pane, decrease the Path Fitting and the Minimum Area (see Step 8). These settings determine how closely Live Trace will follow the contours of the image. As you change the settings, you will see the trace change before your eyes. This is the “Live” part.TIP: In the bottom pane of the Tracing Options dialog, you can choose how you want to preview the trace on screen. This does not affect the paths, it is only a preview. It may be helpful to see this preview because what you want is a smooth line with a fair amount of detail. Too many points and it will look jaggy, too few and it will look weird.Once it looks the way you want it, click Trace. At this point, you can still reopen the Tracing Options and make changes – the trace is still “live.” When you are satisfied with the look of the trace, go to Object>Live Trace>Expand. This will convert the trace into vector paths. NOTE: I cannot stress enough the importance of tweaking the settings in the Tracing Options dialog and getting a good trace to work with. It will save you a lot of time in the long run.
10
Using the Magic Wand (Y), click the white, negative shape. This will select all of the white shapes. Hit delete. Now you’re just left with the black silhouette.
11
Clean up the paths by deleting excess points (use the Delete Anchor Point tool) and smoothing out others (the Smooth tool lives under the Pencil tool and its settings can be adjusted by double-clicking on it). For example: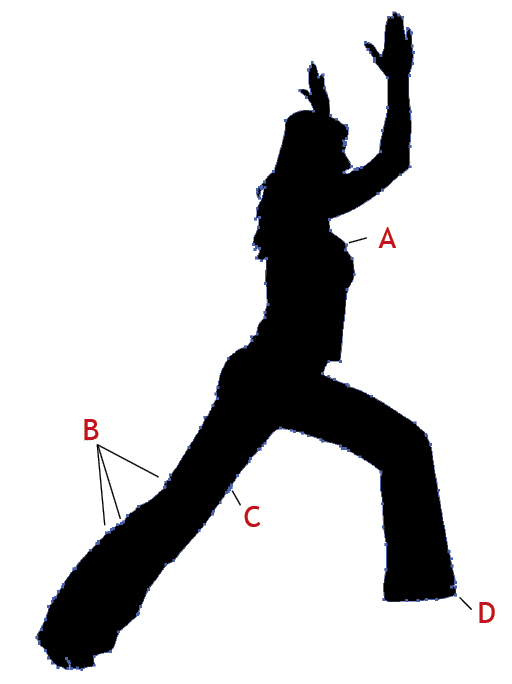 A. Even thought this pooch was in the photo, it looks weird in the silhouette. Get rid of it.B. Too many points hereC. Smooth hereD. Must do something about this foot!TIP: Once you’ve determined the best settings for your trace, you can save it as a preset (click the button in the Tracing Options box). Then if you’re doing a whole batch of similar tracings, you can just pull down to your saved settings rather than going through it all over againTIP: Add a shadow or other element for context and dimension.