
Smart RAW in Adobe Photoshop


What if I were to tell you that Camera RAW could evolve from a global environment to a selective one, would you call me nuts? Maybe, maybe not! Using “smart objects” is the key.
The only thing we need to be ready for is a psd file that is already open to “place” the
new RAW file into. What I have done is create a “blank” psd sized the same as my Nikon D2X file size so the RAW D2X file places in exactly. You can do the same if you like. To get ready just have the “blank” psd open and go to bridge and locate the RAW file we will work on.
Step One
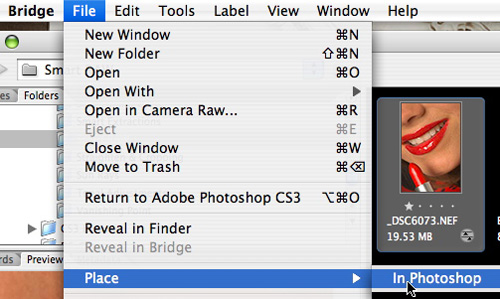
Under bridge, locate the RAW file you wish to place in as a Smart Object. Select it by clicking on it once and under the File menu go to Place>In Photoshop.
Step Two
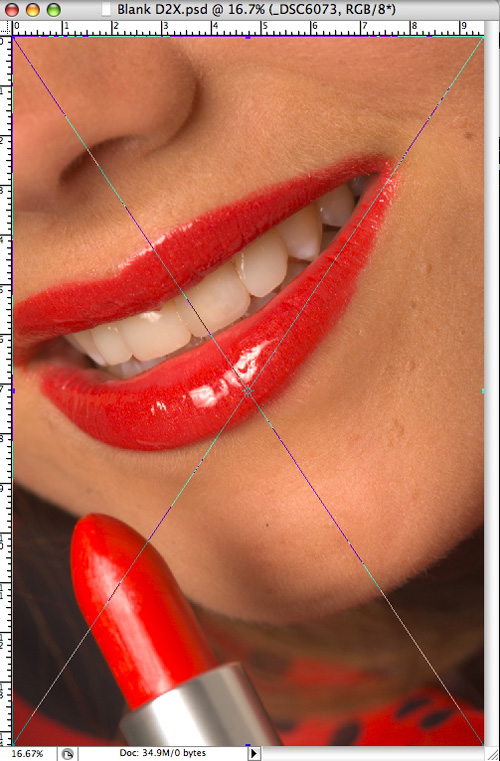
After selecting “place” from this menu, Adobe Camera Raw tool (ACR) will launch and RAW adjustments can be made here, just like when opening any other RAW file. After adjustments are made, select Open and the image will be placed in the blank psd file you have open already. You will notice when it first gets placed in, a large “X” appears across the image indicating that you are about to “place” something into the psd document.
Step Three
Hit Enter to accept the placement of the image into the file and the “X” will go away.
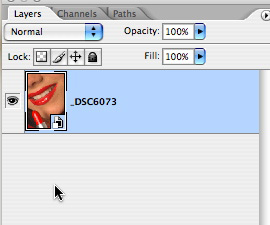
You will notice that the layer added contains the “smart object” icon on the thumbnail.
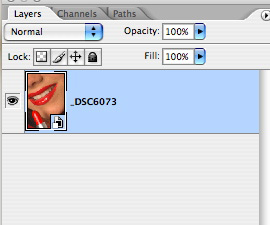
This means, essentially, that this is now a “smart” object. If you were to double-click on that smart object icon it will launch ACR again, allowing you to refine RAW adjustment within the ACR dialog. Pretty cool, eh?
Wouldn’t it be great if we could copy this layer so it could operate independently via ACR? Sure it would.
Step Four
Traditionally we are all used to Cmd-J or a similar command to duplicate a layer – right? Let’s give it a try. Select the layer we just added and then Cmd-J to make a duplicate of that layer.
You should now have two layers in the layer stack. Double-click on the layer that was just added and make some drastic changes to the layer in ACR, so we can see the effects in Photoshop. Once the changes have been made, click “Done” to accept them. Notice that both layers were changed and they are not behaving independently of each other, which is what we are looking for.

Step Five
Let’s Undo that and Delete the copy layer by dragging it to the trash. This palette should look like it did when we started, with just one “smart” layer in our layer stack.
Now that we are back at the beginning, go to the Layer menu and select Layer>Smart Objects>New Smart Object Via Copy.
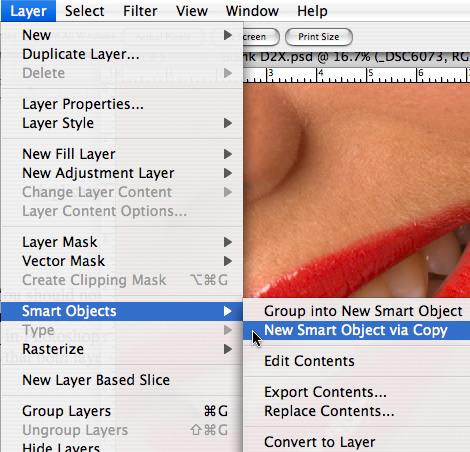
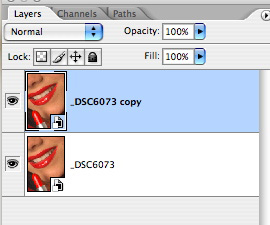
This will add a copy of the layer to the top of the stack.
Step Six
Finally, double-click on the new layer added and again make an extreme adjustment to the image. Click “Done” and notice how only the selected layer is changed! I hope you know what this means. If not, I will give you a hint. Using layer masking on these “smart” layers essentially puts ACR in a selective environment.
Unbelievable but true!
