Time-Saving Templates In Dreamweaver 8
After all the time it takes to create a great-looking webpage, you shouldn’t have to go through all that effort every time you want a similar page. Thanks to the template feature in Dreamweaver, you don’t have to. Creating templates in Dreamweaver makes it possible to reuse your page designs, saving lots of time as you develop a site, or a section of a site, such as the photo gallery featured in this lesson.
You can also use the templates in Dreamweaver to make global changes across many pages at once. By changing the template, you can automatically update all of the pages created from the template. This can save hours of work when the inevitable happens—you or one of your clients realizes that an element on every page of the design needs to change.
[If you’d like to download the assets used in this tutorial to practice this technique, visit www.layersmagazine.com/downloads.html.]
STEP 1 Define Your Site in Dreamweaver
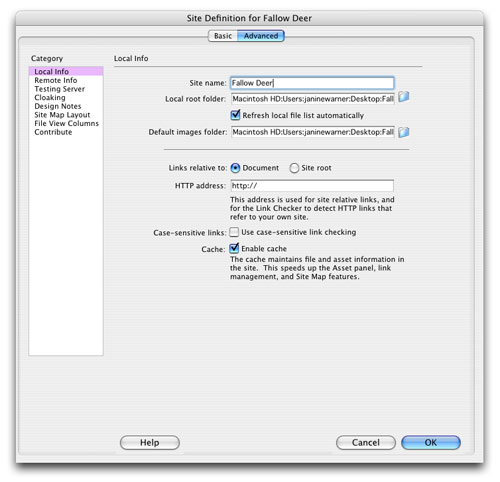
When you’re working with templates, you must define your site before the template feature will work. To define a site, choose Site>New Site. In the Site Definition dialog, enter a name for your site and then use the Browse button (the small folder icon) next to the Local Root Folder field to create or select the main folder of your website. The rest of the site definition fields are not required for templates to work. (You’ll find more detailed instructions for defining a site in Dreamweaver at http://layersmagazine.wpengine.com/defining-a-site-in-dreamweaver.html.)
STEP 2 Create a New Template and Set Page Properties
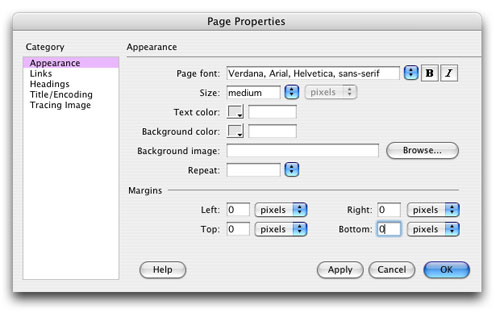
Choose File>New and in the New Document window, choose the General tab. Choose Template Page from the Category list, HTML Template from the Template Page section, and click Create. Add the page title in the Title field at the top of the workspace, and then choose Modify>Page Properties. When you specify page properties, Dreamweaver automatically creates the corresponding CSS styles for the body tag. In this example, the font face was set to Verdana, Arial, Helvetica, Sans-Serif; text Size to Medium; and the Text Color was left at the default black. The margins were also set to 0 to remove the default margin space.
STEP 3 Create a Page Design
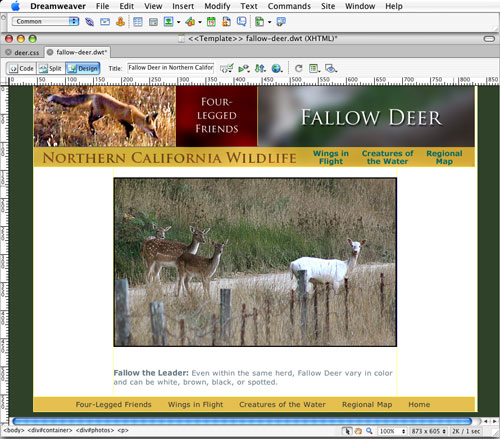
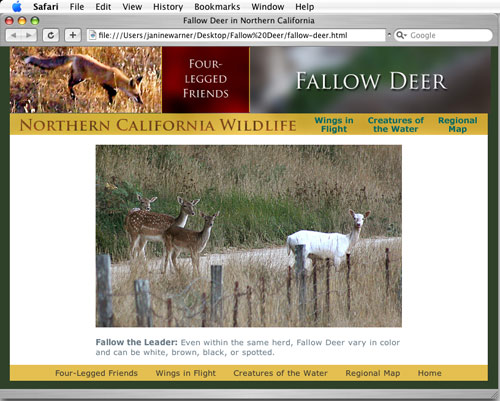
For this lesson, I created a simple design using CSS to center a fixed-width page layout. The navigation links at the top were created with images, and the text navigation links at the bottom are formatted as an unordered list and styled with CSS. The middle of the page is where each image will be placed, so I started by creating the entire layout and inserting the first photo in the series to make sure everything in the design is the way I want it before saving it as a template.
 CREDIT: JANINE WARNER
STEP 4 Set Links in Navigation Bars
One of the biggest advantages to using templates in Dreamweaver is that you can use the template to make global changes to elements such as navigation links. When you save links in a template, Dreamweaver automatically adjusts the path of each link so that all of the links work properly even if the saved pages that you created from the template are in different subfolders. (Just make sure that all of your pages are saved in your root site folder.)

STEP 5 Save the Template
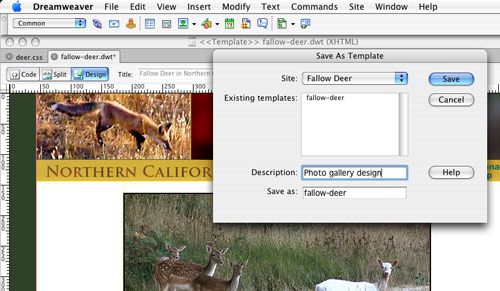
Once you’re done designing and previewing your page, choose File>Save as Template. In the Save As Template dialog, you can give your template a description to make it easier to identify later. Dreamweaver automatically saves template files with a .dwt extension in a folder called Templates. Make sure this is where your template is saved and that you don’t move it. Saving templates in the Template folder ensures that your pages appear in the Templates list in the New Document dialog. (Tip: If you receive a warning that the template doesn’t have any editable regions, just click OK.)
STEP 6 Test Your Work in a Browser
Before you start using your new template to create other pages, test it by previewing it in a Web browser. Better still, test it in a variety of browsers and on different computer platforms to make sure the page will display well for visitors with different systems.
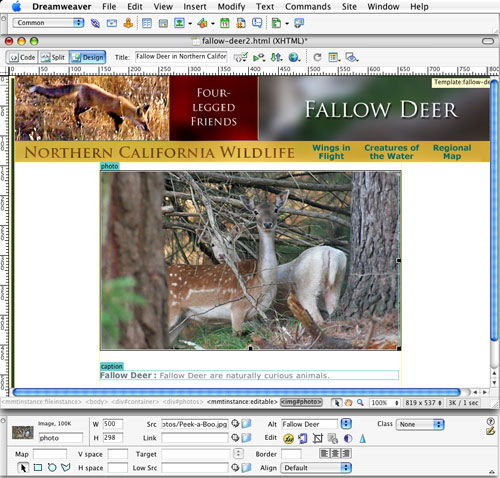
STEP 7 Define Editable Regions
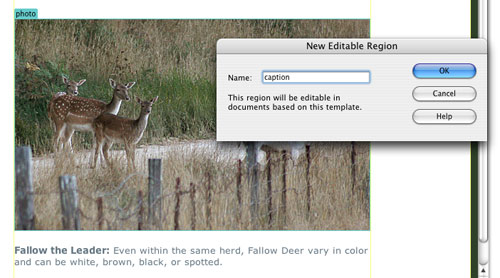
Before your template will be of much use, you need to insert editable regions to identify the areas of the template that you’ll want to change in any pages that you create from the template. In this example, the photo was selected and made into an editable region, then the caption underneath the photo was made into an editable region, as well. To create an editable region, select an image, text, a table cell, or any other page content area and choose Insert>Template Objects>Editable Region. Then give each region a name (don’t include any spaces or special characters).
STEP 8 Replace Images and Text with Placeholders
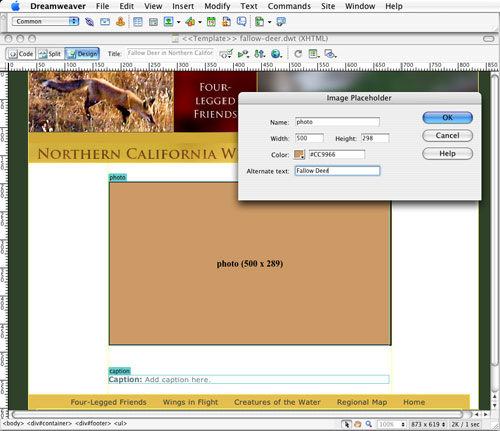
Once you’ve defined your editable regions, you may want to replace the images and text with placeholders so that you never confuse the template with an HTML file in your site. To insert a placeholder image, choose Insert>Image Objects>Image Placeholder. It’s good practice to set the size of the placeholder image to the size you’ll want your images in the design. Dreamweaver includes the size in the text that displays within the placeholder. You may also want to include a brief instruction in any text, such as “Add caption here.” Be sure to save any changes you make to the template.
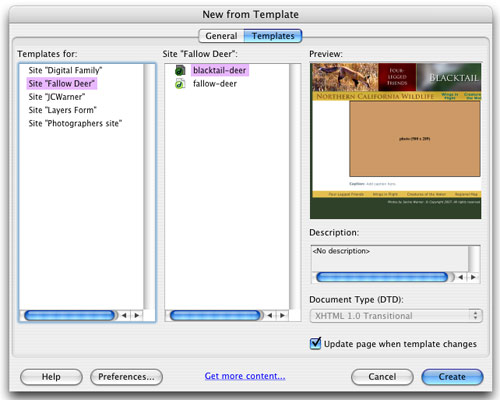
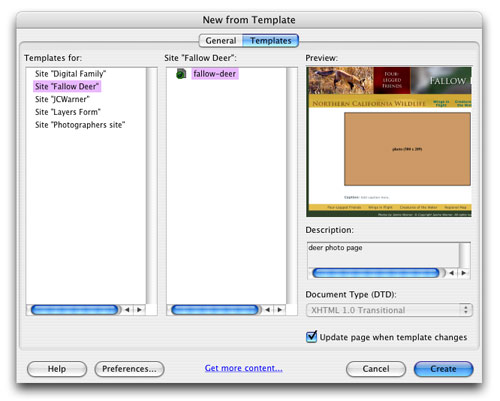
STEP 9 Create a New Page from Template
To create a new page from a template, choose File>New. Click to select the Templates button at the very top of the New Document dialog. Choose the name of the site from the Templates For section on the left (Dreamweaver lists all of the defined sites on your hard drive in this section). Select the template you want from the middle section (Dreamweaver lists all of the templates in each site here). The selected template is displayed in the Preview area on the right. Click Create and then choose File>Save to save the page as an HTML file.
STEP 10 Replace Placeholders
To replace elements in a template, click to select any element in a template’s editable region and replace it as you would in any other page. For example, use the folder icon next to the Src (Source) field in the Property inspector at the bottom of the page to insert an image, or click in a text field and type to enter any text you want to add. Once you’ve added an image, text, or any other element, you can use the Property inspector for formatting as you would to format an element on any other HTML page.
 CREDIT: JANINE WARNER
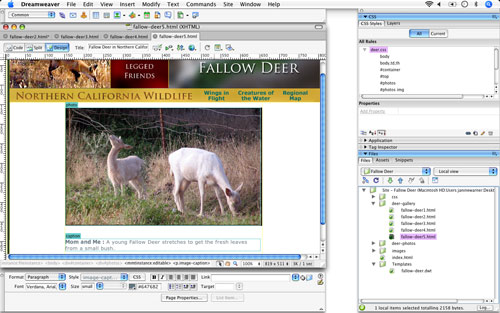
STEP 11 Create Additional Pages from the Template
You can create as many pages as you like from a Dreamweaver template. When you save the new files, Dreamweaver automatically adjusts any links that are set in the template. In this example, a folder was created called deer-gallery and five new pages were saved into that folder. As each page was created, Dreamweaver automatically adjusted all of the navigation links at the top and bottom of each page, and all of the image references, so they would work in that new folder.
 CREDIT: JANINE WARNER
STEP 12 Change the Template to Change All the Pages
After you’ve created a series of pages from a template, you can go back to the template to make changes to any area that’s not an editable region. Dreamweaver will automatically apply those changes to all of the pages created from the template. Note that areas of a template that are specified as editable regions will not be updated on your other pages. This prevents the unique content on each of your pages from being overwritten when you use the template. In this example, a photo credit and copyright information were added to the bottom of the template.
 CREDIT: JANINE WARNER
STEP 13 Save Template to Update Pages
When you save the template, you’ll be prompted with the Update Template Files dialog. Click the Update button to save the changes to all of the pages that were created from the template. Choose Don’t Update if you don’t want the changes applied. In this example, the new photo credit and copyright information are automatically added to all five pages created from the template.

STEP 14 Create Different Templates for Each Section
You can create different templates for different sections of your site to use these automated features while still creating a variety of designs for your pages. You can even create nested templates, designing one template that includes site-wide features, such as navigation; and nested templates that include variations on the design, such as different banners for each section or different layouts.