
There’s a design trend that’s blown up over the past year and it’s based around one simple shape—the circle. Not just one circle, though, lots of them. In fact, it’s circles within circles. After looking at these designs at least a 100 times, it hit me that we could do this with a custom brush in Photoshop and create some really cool effects. So here goes:
1 CREATE A NEW DOCUMENT
Let’s start off by creating a brand-new blank document (File>New). If you want to follow along, make your document 1000×1000 pixels at 72 ppi. One thing to remember here is that it’s always good to start off a little larger then you’d ever want to use this brush. You can always reduce the size of the brush later.

2 DRAW A CIRCLE
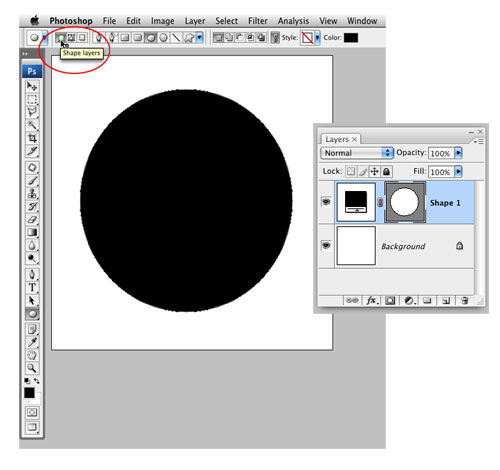
Select the Ellipse tool from the Toolbox (it’s grouped with the Shape tools). Make sure you have the Shape Layers option selected at the top left of the screen in the Options Bar. Press D to set your Foreground color to black and draw a circle on the canvas. To constrain the ellipse to a perfect circle, hold down the Shift key as you draw.
3 DUPLICATE AND TRANSFORM SHAPE LAYER
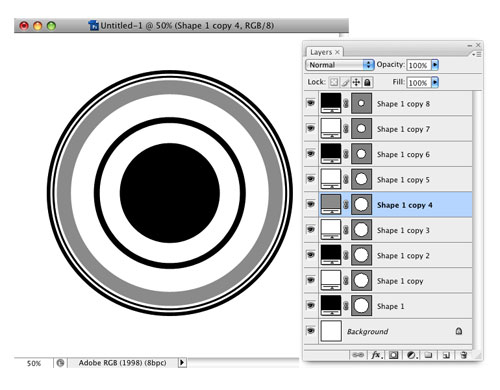
Duplicate the shape layer by pressing Command-J (PC: Ctrl-J). Double-click on the duplicated shape layer’s thumbnail in the Layers panel, change the color to white in the Color Picker, and click OK. Now we need to make this circle smaller, so click the Edit menu and choose Free Transform Path. Hold down Option-Shift (PC: Alt-Shift) and drag one of the corner handles inward to make the new copy smaller. Keep dragging until you have what appears to be a thick black stroke around the white circle. Press Enter when you’re done, to commit the transformation.

4 CREATE ADDITIONAL CIRCLES
Repeat Step 3 a bunch of times, each time varying how much you decrease the size of the circle as well as the color. Usually, I switch between black and white, but you can also try using shades of gray. Just make sure that it’s either black, white, or gray, as colors won’t work when creating a custom brush.
5 DEFINE CIRCLE AS A BRUSH
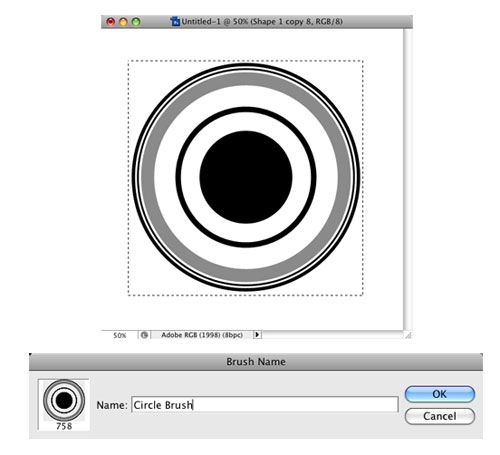
We now have the makings of our circular design element but it’s several layers, which would be a pain if we wanted to add a lot of these to an image. Let’s turn this into a brush so we can paint it on quickly. Select the Rectangular Marquee tool (M) and drag a square selection around the circle, then click the Edit menu and choose Define Brush Preset. (Note: If Define Brush Preset is grayed out, click on another layer in the Layers panel to activate the command.) Give your brush a descriptive name and click OK to save it.
6 CREATE NEW FILE; FILL BACKGROUND
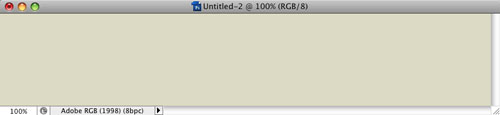
Okay, at this point we’ve got a new brush and now we’ll use it in an image. First, create a new document. As ours is going to be a banner for a website, we’ll make it 800 pixels in Width and 150 pixels in Height (72 ppi). Next, click on your Foreground color swatch and in the Color Picker, set your color to R:225, G:224, and B:206, then click OK. Press Option-Delete (PC: Alt-Backspace) to fill the Background layer with that color.
7 SELECT YOUR NEW BRUSH
Now we get to the fun part—our brush. We’ll need the Brushes panel for this, so switch to the Brush tool (B), then click the Window menu, and choose Brushes to open it. On the top-left side, click on the words “Brush Tip Shape.” Then, scroll through the list on the right to find the Circle Brush you just created. Change the Diameter setting to 65 px and the Spacing setting to 75%. Now click on the words “Shape Dynamics” to see those settings. Change your Size Jitter setting to 60%.

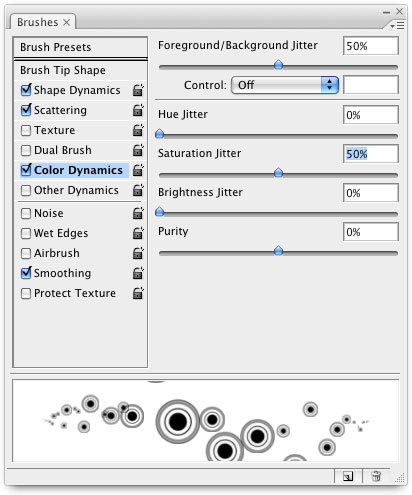
8 SET SCATTERING AND COLOR DYNAMICS
Click on the word “Scattering” from the list on the left. Change the Scatter setting to 300%. Finally, click on the words “Color Dynamics” and set both Foreground/Background Jitter and Saturation Jitter to 50% (make sure everything else is set to 0%). You’re done in the Brushes panel for now and all that’s left is to set your Foreground color to R:84, G:109, and B:131 and your Background color to R:0, G:45, and B:84 (you can pick your own colors here if you want).
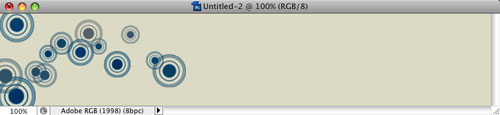
9 PAINT WITH YOUR NEW BRUSH
Before you start painting with the brush, go ahead and click the Create a New Layer icon at the bottom of the Layers panel to create a new blank layer; that way all of our brushing stays off the Background layer. Now just click with your mouse and start dragging across your image. You’ll see the circles appear randomly scattered and in different sizes wherever you paint. The color even changes slightly because you turned on Color Dynamics and adjusted the Foreground/Background Jitter. This tells your brush to vary between your current Foreground and Background colors. Cool, huh?
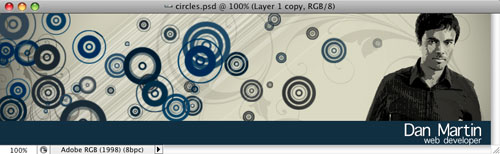
10 PLACE OTHER GRAPHICAL ELEMENTS
Put your final elements into the image. Here, we’ve added a photo on the right as well as some text. To change things up a bit, we’ve also created a few different brushes using Steps 1–5 and varying the circle transformations for different styles (thick lines and thin ones). Finally, we used an ornamental scroll shape in the background from www.iStockphoto.com (file number 4619009).
©ISTOCKPHOTO/CAROLE GOMEZ
©ISTOCKPHOTO/NATALLIA HUDYMA
