
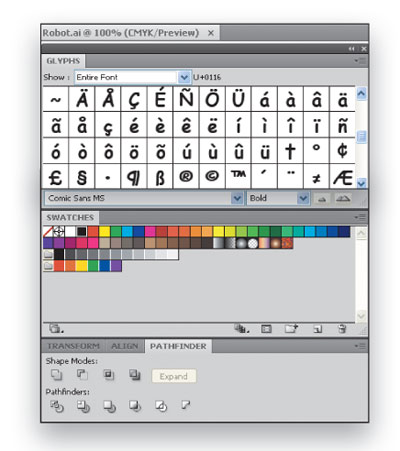
Using the Glyphs Panel in Illustrator
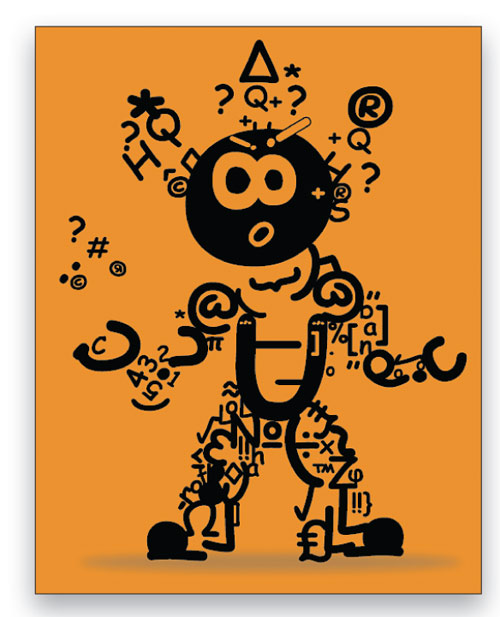
Need a monster to gain world domination? In this tutorial, we’ll teach you how to create a font monster entirely out of a single typeface. What you do with it after that is entirely up to you! You’ll learn how to use the Glyphs panel and how to outline, resize, and rotate fonts. And if you’re adventurous, you can try out the Pathfinder panel, as well. Also, be sure to check out Jonathan Yules’ original Helbotica font monster (www.invdr.com), which inspired this tutorial.
1 [SET UP YOUR DOCUMENT & SETTINGS]
Choose File>New to create new A4-sized document. For maximum efficiency when designing our font monster, you’ll want the Pathfinder panel (Window>Pathfinder), Swatches panel (Window>Swatches), and Glyphs panel (Window>Type>Glyphs) open and within easy reach. Click-and-drag each panel to the left of the artboard and arrange them into a single toolbar. (Note: To dock panels together, drag the panel that you want to appear on the bottom near the base of any panel, and when you see a blue line appear, release the mouse button.)
2 [TYPE THE ALPHABET]
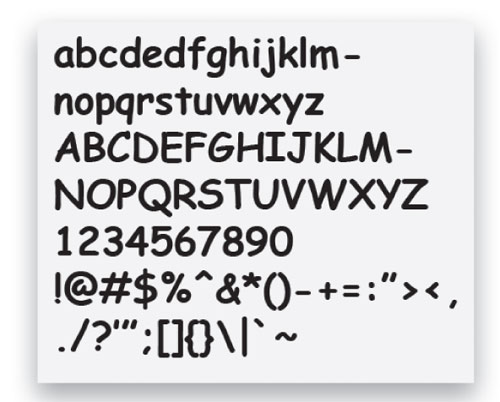
Select the Type tool (T) and choose a typeface in the Control panel that your font monster will be based on. In this tutorial, we’re using the notorious Comic Sans (Bold) just for fun! Drag out a big box to the right of your artboard, and type the alphabet in both lowercase and uppercase. Also type all of the numbers and special characters. Don’t click anywhere just yet.
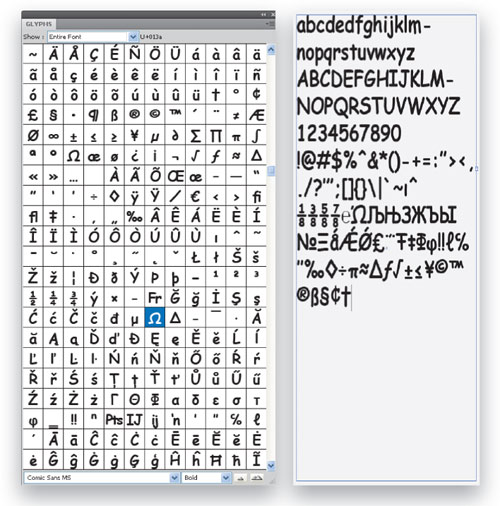
3 [MAKE USE OF THE GLYPHS PANEL]
Look in the Glyphs panel and you’ll notice a lot of unfamiliar characters, but you’ll want to use these characters in your design, so go ahead and double-click on any characters that you find useful. If you’ve clicked outside of the text box, simply use the Type tool and click back in the box, then double-click on the glyph characters.
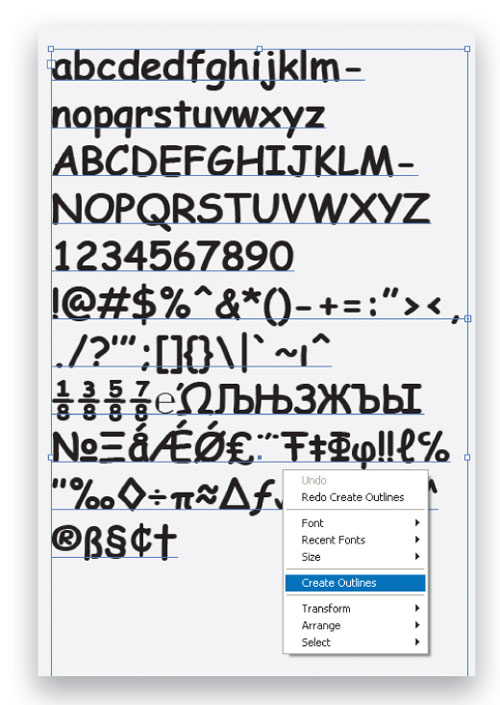
4 [CONVERT TEXT TO OUTLINES]
Now you need to create outlines of the characters so that you can use them as objects rather than as a typeface. Choose the Direct Selection tool (A), click once on the type, then Control-click (PC: Right-click) and choose Create Outlines from the list. You’ll notice that all the objects are in one group. We need to separate each character, so Control-click (PC: Right-click) again and choose Ungroup. Each character can now be selected on its own.
5 [CREATE A BACKGROUND]
Click the Create New Layer icon at the bottom of the Layers panel to create a new layer. Choose the Rectangle tool (M) and drag out a large rectangle over the whole artboard. This will be the background and mood of your piece, so if you’re creating a happy monster, go for a happy color; if you’re doing an angry or sad monster, try red or blue. The choice is yours. You can change this color later; it’s only here to set the mood of the piece. To change the color of the rectangle, select it, click on the Fill icon in the Toolbox, then choose a color from the Swatches panel.
6 [LOCK THE BACKGROUND LAYER]
With the background created, you’ll want to leave this layer on its own so you can create a more complex background at a later time, if you choose to do so. This is just good practice. Click-and-drag the background layer to the bottom of the layers stack in the Layers panel. It’s also a good idea to rename the layers. Do this by double-clicking on them and naming them in the dialog that appears. Now click once in the empty square to the right of the Eye icon to lock the background layer.

7 [GET INSPIRED]
When designing, gathering inspiration from a number of sources can be beneficial because it helps guide you in the right direction and gives you a base for your designs. Go forth and get inspired by whatever you have nearby. You can even draw your own robot at this stage; it’s up to you. In this tutorial, we’re continuing with the comic theme (hence Comic Sans), so for inspiration we’re using a jester illustration from iStockphoto. For easy reference, put the image on your Illustrator artboard. This is also a good time to save your document.

CREDIT: ©ISTOCKPHOTO/JOE PERAGINO
8 [DRAG CHARACTERS ONTO ARTBOARD]
With the artboard set up, now comes the fun part—designing the font monster! Now drag some letters onto the artboard to start creating your character. To do this, use the Selection tool (V), hold down the Option (PC: Alt) key, and drag a letter from the right side of the artboard. Holding down Option (PC: Alt) as you drag copies the character, which means you’ll be able to use the character more than once. Copy the characters that you think will work to the appropriate positions (i.e., match shapes to the body parts).
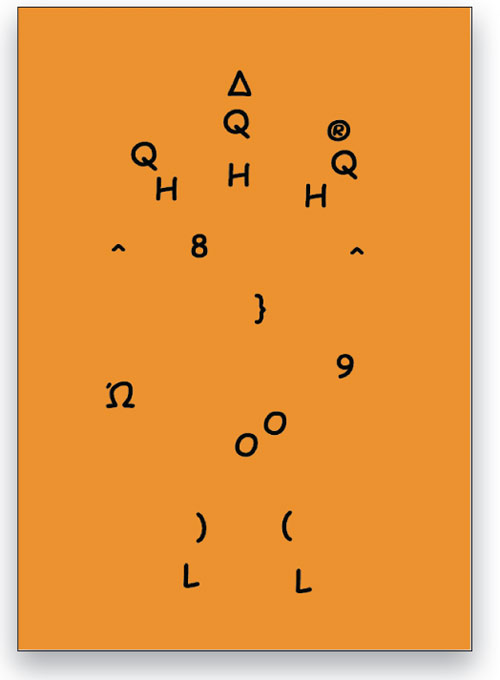
9 [RESIZE & REPOSITION YOUR CHARACTERS]
In the previous step, we positioned the characters in what we thought could work in relation to our font monster. Now let’s resize each of the characters to the right proportions. Click once on a character, press-and-hold the Option-Shift (PC: Alt-Shift) keys, and drag the corner of the character to resize it proportionally from its center outward. To reposition a character, simply click-and-drag it to the new position. Repeat this for the rest of the characters in sizes you think will work best. Remember to save your document.
10 [ROTATE YOUR CHARACTERS]
With some of the characters in place, we have a general idea of what position they need to be in, so we can begin to rotate them. Click once on a character with the Selection tool and then press the R key to select the Rotate tool. Click-and-drag to rotate the selected character in a position you think will work. When finished with that character, press V to choose the Selection tool, click off the artboard, and click on the next character you’d like to rotate. You may also want to resize the characters while rotating; just follow the directions in Step 9.
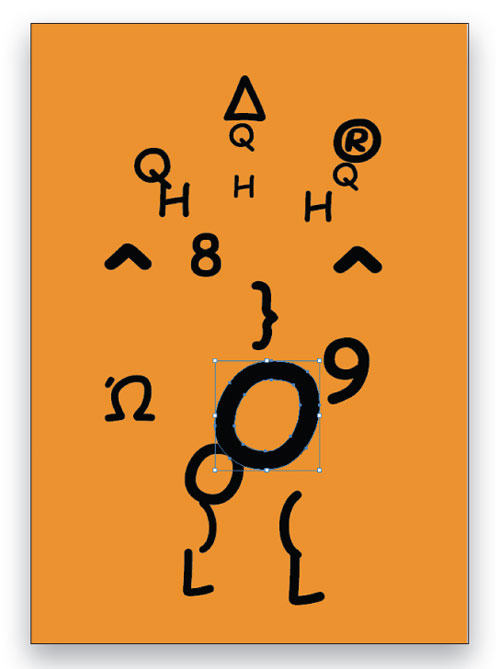
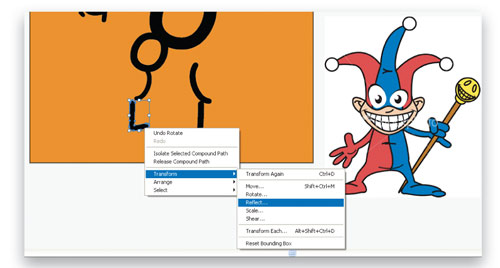
11 [REFLECT YOUR CHARACTERS]
Another thing that comes in handy when creating illustrations is the reflection command. Notice that we’ve used two Ls for the legs; however, the foot on the left is facing the wrong way. We can reflect this L shape and make it face the other direction. With the Selection tool, click on the character, then Control-click (PC: Right-click) and choose Transform>Reflect. Enter the appropriate settings and voilà, your shape will be flipped! You can also use the other commands under the Transform function to manipulate and, strangely enough, transform your shapes.
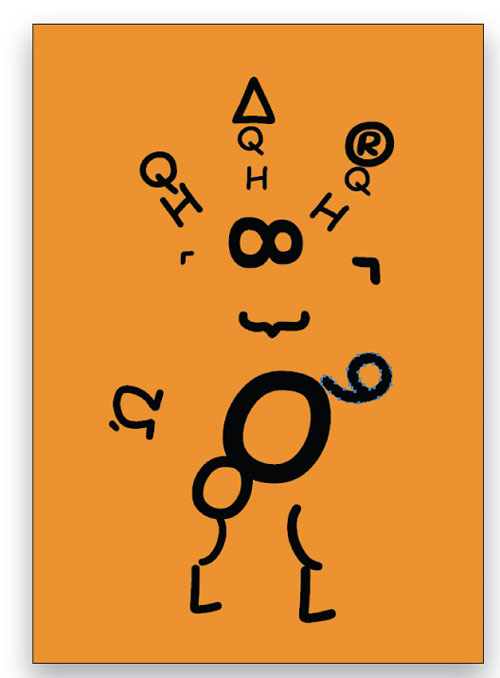
12 [ADD TO YOUR MONSTER]
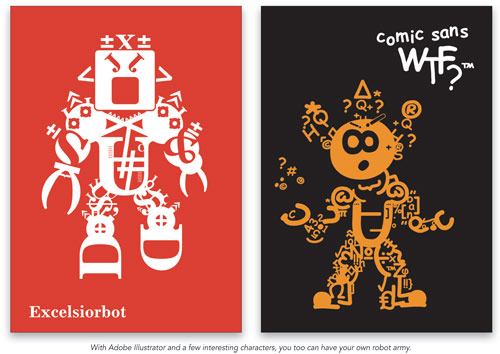
Repeat Steps 8 through 11 and let your creativity run wild to create your own font monster. For the advanced users, you may be interested in using the Pathfinder panel. Try selecting a combination of letters and experimenting with the Pathfinder commands. If you need more help with the Pathfinder panel, click Help>Illustrator Help and type in “pathfinder.” Keep experimenting and repeating these steps and you’ll have a font monster in no time.
ALL IMAGES BY JACOB CASS UNLESS OTHERWISE NOTED
