Using the Mesh Tool and 3D Effects in Illustrator
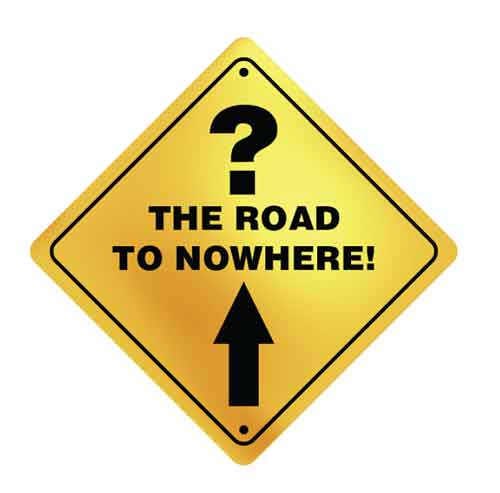
This time around we’re going to create a caution street sign. It’s made up of some very basic shapes, but we’re going to go that extra step and add some realistic shading using the Mesh tool and some blend modes, then finally top it off with some 3D effects.
1 [CREATE BASIC SHAPE; ADD COLOR]
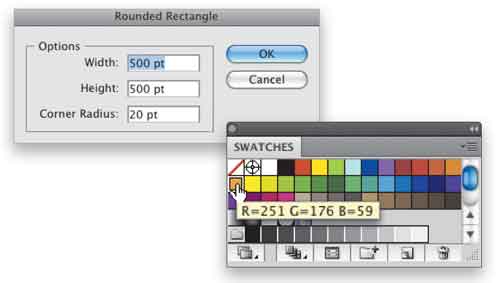
Choose File>New to create a new RGB document. In the Toolbox, click-and-hold on the Rectangle tool and choose the Rounded Rectangle tool from the list. Click once on the artboard and in the Rounded Rectangle dialog that appears, enter 500 pt for the Width and Height, and set the Corner Radius to 20 pt. Click OK. Because this is going to be a typical caution sign, it needs to be yellowish-orange. Open the Swatches panel (Window>Swatches) and choose the preset yellow color as shown here.
2 [ROTATE SHAPE; COPY-AND-PASTE]
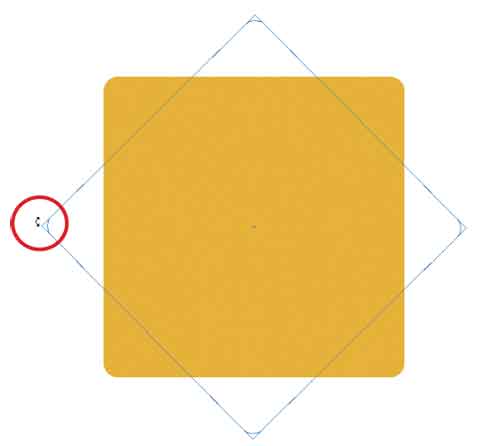
Choose the Selection tool (V) to select the shape and position the cursor just outside one of the corners until it changes to a curved double arrow (this allows you to rotate the object). Hold down the Shift key and rotate until it snaps into position. Now we have our basic sign shape and color. Press Command-C (PC: Ctrl-C) to copy this shape to the clipboard and then choose Edit>Paste in Front to place the object directly in front of the original. This will save you from having to align the shapes after the fact.
3 [ADD INNER STROKE; LOCK SELECTION]
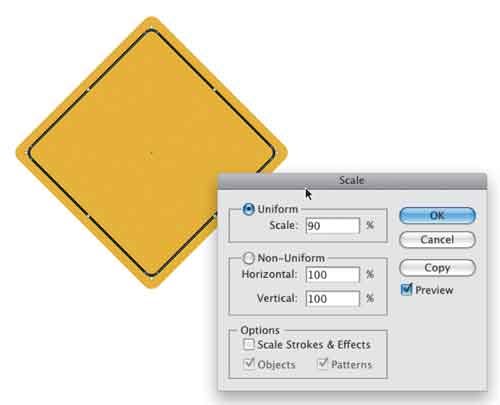
In the Control panel, set the Fill for this shape to None, the Stroke to black, and the Stroke Weight to 5 pt. In the Toolbox, double-click on the Scale tool (S) to open the Scale dialog. In the Uniform section, set the Scale to 90% and click OK. With the Selection tool, select both objects and then choose Object>Lock>Selection. This will prevent you from accidentally selecting the object and moving any of the paths.
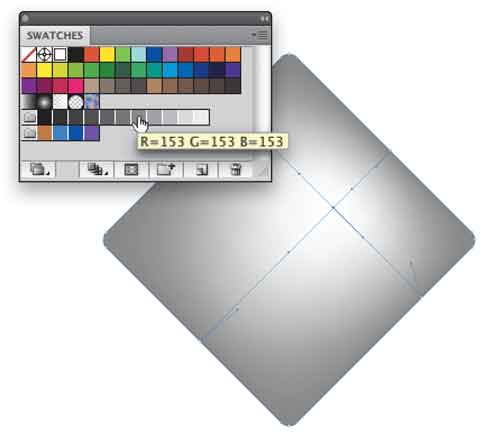
4 [PASTE AGAIN; ADD GRADIENT MESH]
Choose Edit>Paste in Front, then open the Swatches panel, and select a neutral 50% gray, as shown here. This will be the layer that we use to add shading to the graphic. We’ll achieve this using the Mesh tool in a unique way. Go to the Toolbox, choose the Mesh tool (U), and click inside the shape. Now choose white from the Swatches panel. You’ll notice the white fades out from the anchor point to the base gray color of the shape.
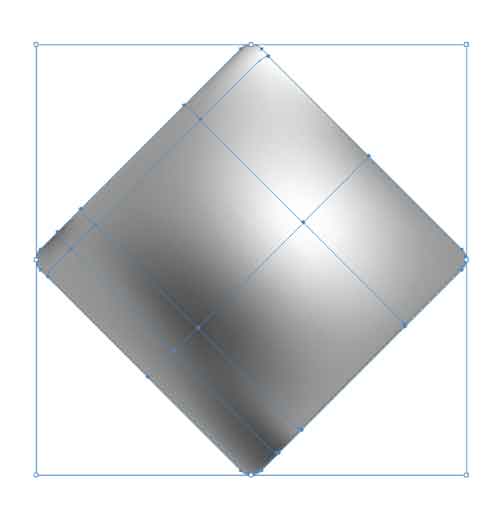
5 [ADD MORE ANCHOR POINTS; CHANGE COLOR]
Now you can click in a different area of the shape to add a new anchor point. Try to click directly on an existing gridline so that gridlines share anchor points. Now choose a darker gray or even black from the Swatches panel to change the color in that part of the mesh. You can click to add more points and adjust the shading around those points. You can also select existing points and change the color settings, if necessary.
6 [BLEND OBJECTS]
Once you have the shading the way you like, open the Transparency panel (Window>Transparency). Choose Select>All, then click on Normal to open the blend mode drop-down menu, and choose Overlay. This will interact with the yellow background color and give you pretty realistic shading.

7 [ADD MOUNTING HOLES AND TEXT]
Deselect everything, and set the Fill color to black in the Control panel. Choose the Ellipse tool (L), press-and-hold the Shift key, and drag out a small circle on your sign. Go to Edit>Copy then Edit>Paste. Choose the Selection tool and position the holes on the sign. If you need help aligning the holes, open the Align panel (Window>Align), select both circles, and click the Horizontal Align Center icon. Now add some text or graphics to the sign. Make sure the Fill color is black and position them in the frame.
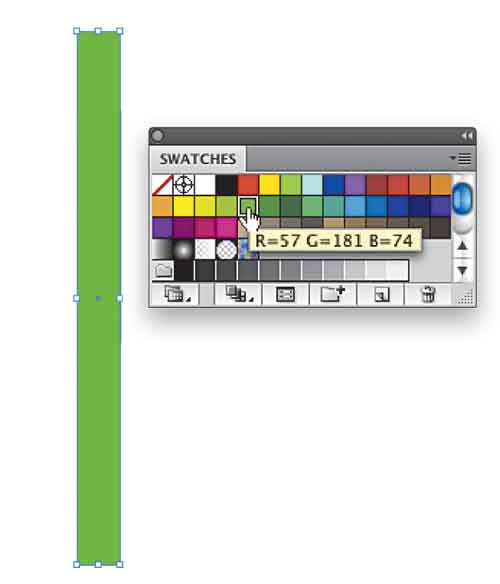
8 [CREATE THE SIGN POST]
Here we’re going to use the Mesh tool to create the post for our sign, but we’re going to take a different approach to applying the mesh so you can see another way of using this powerful feature. Start by grabbing the Rectangle tool and draw a tall, narrow rectangle. Give this shape a Fill color of green as shown here. You can also open the Color panel (Window>Color) and input these numbers manually.
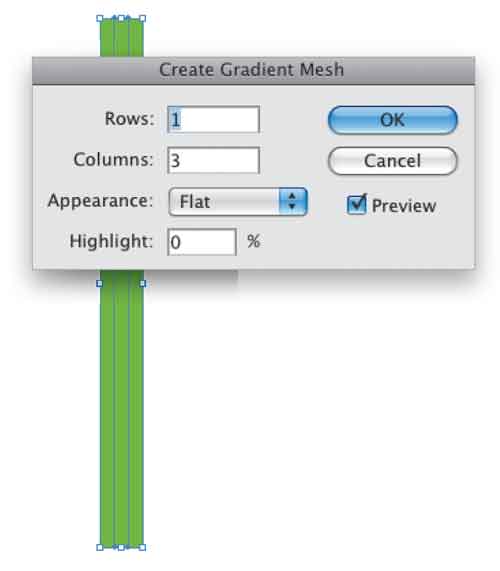
9 [APPLY THE MESH]
With the object still selected, choose Object>Create Gradient Mesh. In the dialog, set the number of Rows to 1 and the number of Columns to 3. Leave the appearance to Flat and click OK.
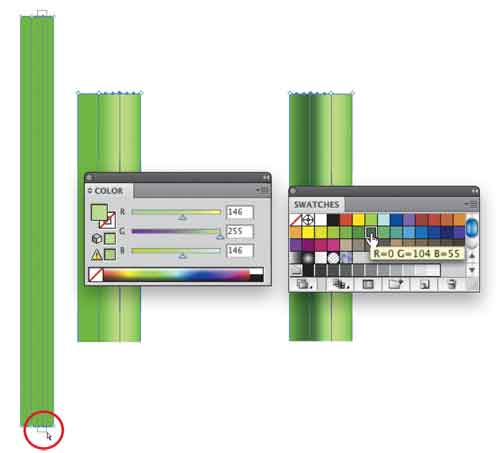
10 [APPLY THE SHADING]
Using the Direct Selection tool (A), locate the third grid line from the left and click-and-drag around the entire length of the line so that only the top and bottom anchor points of this line are selected, as indicated by a solid blue color. Go to the Color panel and set these anchor points to R:146, G:255, and B:146. Still using the Direct Selection tool, select the grid line to the immediate left and set the color of these anchor points to a darker green using the Swatches panel. Go to Object>Arrange>Send to Back and then use the Selection tool to position the post behind the sign.
11 [ADD BACKGROUND]
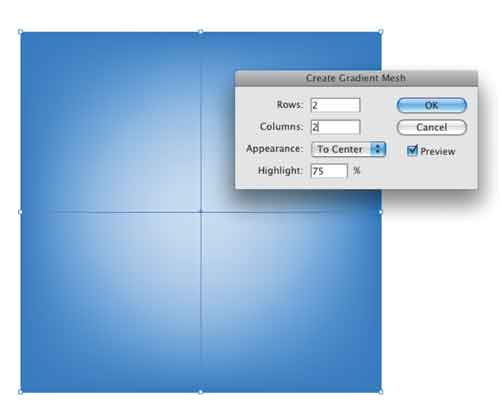
Now let’s make a quick gradient backdrop the same way as we did in the previous steps. Grab the Rectangle tool from the Toolbox, draw a square shape, and fill it with a solid blue color. Then choose Object>Create Gradient Mesh. This time set the number of Rows and Columns to 2 each. Set the highlight Appearance setting To Center and set Highlight to 75%. Click OK. Position this background graphic over the sign graphic then go to Object>Arrange>Send to Back.
12 [ROTATE SIGN]
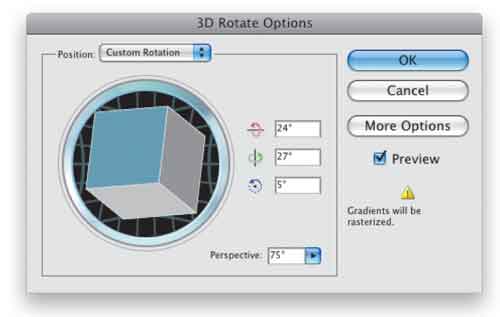
Finally, let’s add some dimension to the sign. Choose Object>Unlock All and then Shift-click the target icons for all the layers in the Layers panel that make up just the sign graphic. Now choose Object>Group, then go to Effect>3D>Rotate. In the Rotate 3D Rotate Options dialog, set the Perspective to 75°. You can rotate the object in 3D by clicking on the cube and repositioning it manually, or you can input the settings as shown here. Click OK. This puts the object at a more realistic angle.
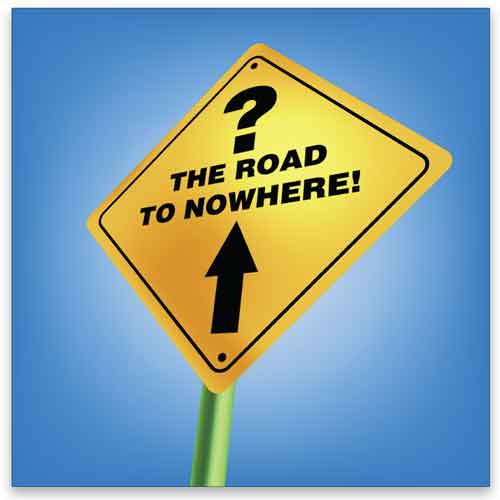
Final Image