When HTML Goes Bad
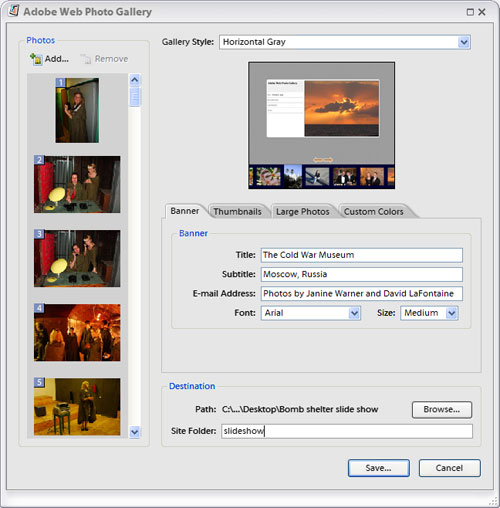
Having just returned from a trip to Russia, I wanted to create a slide show to use in this column. Because I wanted to share my photographs with friends and family, I thought the automated Web Photo Gallery in Photoshop would be a fast, easy way to create a basic site and then I could use Dreamweaver to edit the automatically generated HTML pages to add captions.
I’d done some preliminary testing of the Gallery feature when CS3 was first released and noticed there were problems with Photoshop’s HTML code so the galleries didn’t display properly in Dreamweaver. As this had also been a problem in previous versions, I thought a lesson on how to work around this incompatibility would make a good column. Unfortunately, I completely underestimated just how bad the HTML code is in the Gallery pages of Photoshop. (I’m a big fan of Photoshop but when it comes to the automated Web Photo Gallery, the HTML code leaves a lot to be desired.)
As a result, this column focuses on how to edit (and clean up) HTML code—a useful skill even if you don’t use Photoshop.
STEP 1 Editing a Web Photo Gallery
These editing tips can be used to make changes to any webpage; but before you embark on these sometimes irreversible alterations, however, I strongly encourage you to make a backup copy of the site.
Note: I finally got the best results for my photo gallery with Photoshop Elements 3. Photoshop Elements 5 creates Flash galleries, which can’t be edited in Dreamweaver, and after considerable testing, I gave up on the Web Photo Gallery in Photoshop CS3 because it produced code that was unreadable in Dreamweaver (a problem I hope Adobe will address in future versions).
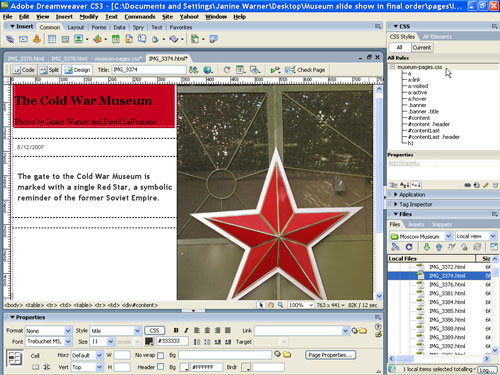
JANINE WARNER AND DAVID LAFONTAINE
STEP 2 Set Up Site in Dreamweaver
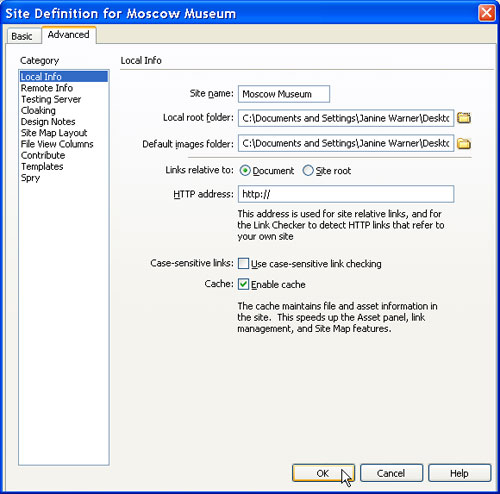
No matter what kind of site you’re editing, your first step is to go through Dreamweaver’s site set-up process. First, choose Site>New Site (I prefer to use the Advanced option: Click the Advanced tab at the top of the Site Definition window). You don’t have to fill in every field, but here’s the important part: in the Local root folder field, you want to select a folder that includes all of the files in your site or gallery. (For more detailed instructions, see my online tutorial “Defining a Site in Dreamweaver” on the Layer’s website in the Tutorials section.)
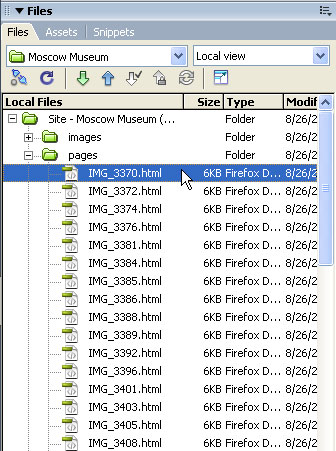
STEP 3 Open the Home Page
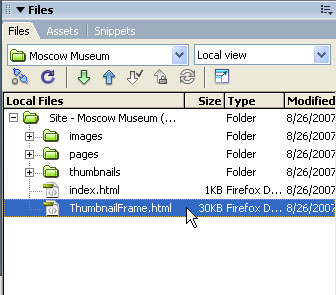
You can display all of the files and folders in a site by choosing Window>Files. Double-click on a filename to open it. The home page of any website should be named index.html. (Note: Some sites hosted on Microsoft servers use default.html for the home page.) As you can see, Dreamweaver was able to display the design generated by Elements 3 pretty well; however, I’m sorry to report that the main page of a photo gallery generated by Photoshop CS3 just looked like a blank page in Dreamweaver because of code conflicts.

STEP 4 Where Did All My Thumbnails Go?
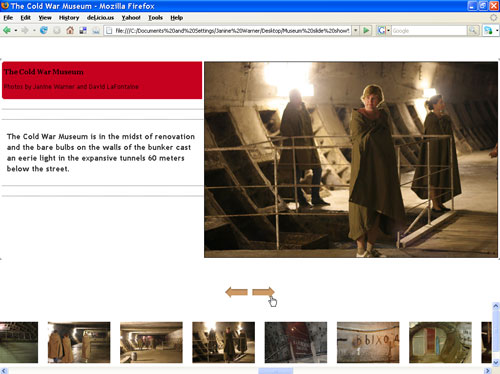
Only one thumbnail is displayed so there’s a problem, but before I start troubleshooting, I’ll preview a page in a Web browser. All of my thumbnail images displayed across the bottom of the screen in Firefox just fine and as I clicked on each one, the automatically generated gallery pages displayed the larger versions of each image okay. Now I just need to figure out why Dreamweaver won’t display the thumbnails. (Hint: Most Web browsers are more forgiving of bad HTML code than Dreamweaver, although badly formed pages can display quite differently from one browser to another.)
STEP 5 Open the Thumbnail Frame Page
Another shortcoming of the Web Photo Gallery in Photoshop and Elements is that most of the designs use HTML frames, which have fallen out of favor for some good reasons. I decided to live with the limitations in return for letting Elements do all the work of resizing and optimizing my images, inserting each one into a separate HTML page, and setting all the links (including forward and back arrows). Because the design uses frames, each section is a separate page, so to edit the thumbnails section, I had to open the ThumbnailFrame.html page.
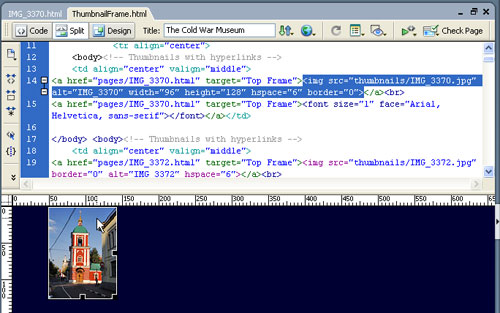
STEP 6 Use Split View to See Behind the Scenes
Click on the Split icon at the top of the screen to divide Dreamweaver’s workspace into two parts so that you can view the code and design views simultaneously. Another great Dreamweaver feature is that when you click on any element in the design view, such as the thumbnail that’s visible, the corresponding code is highlighted—making it easier to search for problems in the page. For example, look at the code below the highlighted text, and you’ll see that the other thumbnail images are included in the code; they’re just not displaying in Dreamweaver’s design area.
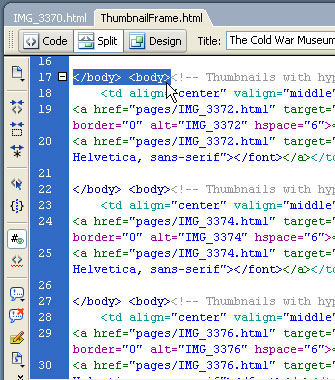
STEP 7 Diagnosing the HTML Code
If you know even a little HTML, it’s not hard to find the error in this code: the repeated “body” tag. This most basic HTML tag should only appear once in any webpage, at the very top and bottom of the content area (surrounding the body of the page). I can’t explain why the Web Photo Gallery in Elements inserted body tags between each thumbnail in this frame design but in the next step, I’ll show you an easy way to fix a problem like this once you identify it in any webpage.
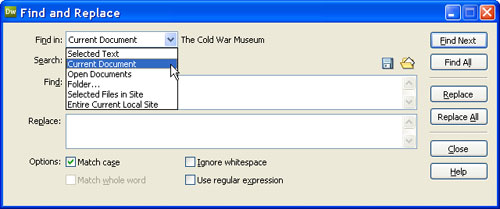
STEP 8 Find and Replace Is Your Friend
Find and Replace (under the Edit menu) is especially helpful if you want to make repetitive changes in Dreamweaver. A drop-down list at the top of the Find and Replace dialog makes it easy to specify if you want to search the current page (as in our example) or every page in a website or folder. I’ve avoided many tedious hours of work thanks to Dreamweaver’s ability to search across many pages at once (I used this feature to automatically remove the background image from more than 80 individual image pages in this gallery in a few seconds).
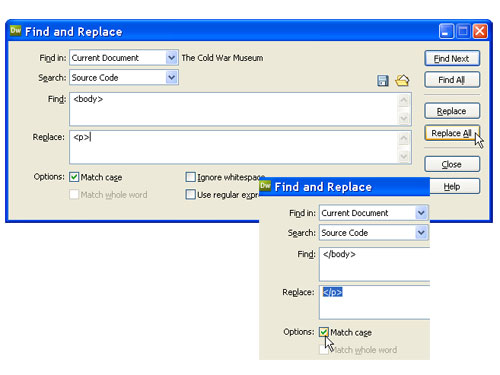
STEP 9 Replace Extra Body Tags with Paragraph Tags
Having identified that there were body tags between each image, the easy fix was to replace the body tags with paragraph tags, a more appropriate separator for each of these thumbnails. To ensure the tags were replaced properly, I did this in two steps: (1) Search for and replace it with
(the paragraph tag); and (2) replace the close tag with the close
tag. As soon as the replacements were made, all I had to do was hit the Refresh button in the Files panel and my thumbnails displayed perfectly in Dreamweaver.
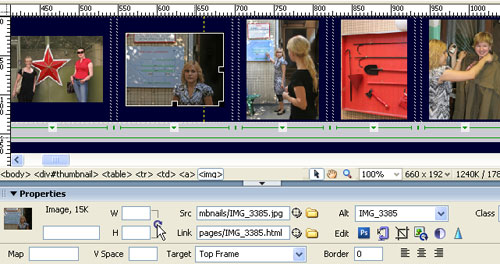
STEP 10 Add Image Attributes
When you’re working on pages created in a program other than Dreamweaver, you may also find that they’re missing important details, such as image attributes. In our example, the Height and Width aren’t filled in—something Dreamweaver does automatically when you insert images into a page. Just use the Property Inspector to add these attributes by first selecting the image and then clicking on the Reset Image to Original Size icon (a small, circular arrow icon that appears only if the height and width are missing or different from the actual size of an inserted image).
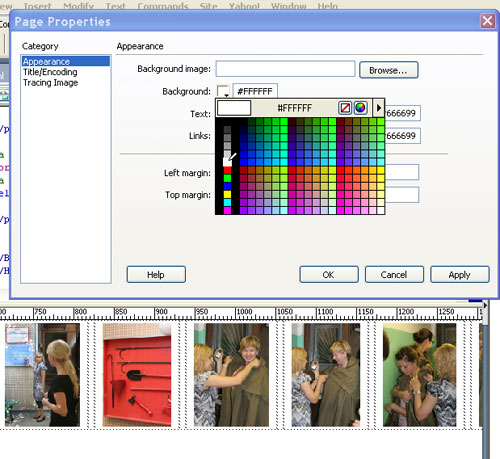
STEP 11 Change Background Colors
Changing the background color behind the thumbnails is easy: Simply choose Modify>Page Properties and use the Color Picker next to Background to add a white background in place of the dark blue one included with this design. Because all of the thumbnails are included in this one frame page, this simple change took care of all of our thumbnails at once. When you press Apply, you can see the effect of the Page Properties changes immediately. Click OK to close and save changes.
STEP 12 Edit Each Photo Page Separately
Each of the thumbnails is linked to a separate HTML page that Elements automatically generated and linked. To add a caption to each of these pages, open each one separately. It’s a bit tedious but I have yet to find an automatic way to write text, such as these captions. In contrast, any changes to the code that have to be repeated on every page, such as removing the background image, can be automated using Find and Replace.
STEP 13 Use Styles to Make Global Changes
To change the font face, size, and color of the text on each photo page, we created an external style sheet and defined styles for the headings and captions. Then it was a simple matter of attaching the style sheet to each of the pages, just as we added the captions. This not only saved having to define styles or apply individual formatting to each page, it set up the gallery so that it’s easier to make global changes later if you decide, for example, that you want to change the font or the color.
STEP 14 Preview the Design in a Browser
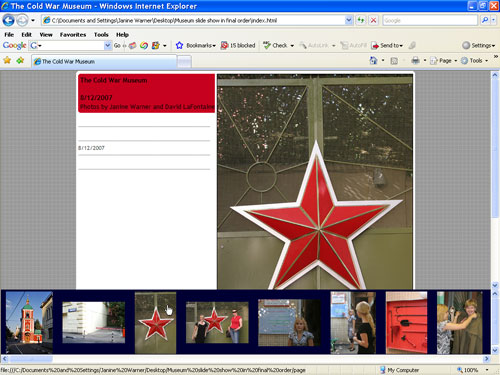
To see how the final design turned out, I previewed the page again in a browser. Remember, if you’re working on a site that uses frames and you want to see the full design, you need to preview the frameset page (in this case the index.html page), not the individual thumbnail or photo pages. It’s a good habit to preview your designs frequently as you’re making changes, as this can help you better identify other potential errors in the code.