
Dreamweaver Slide Shows: Quick and Creative
A friend once told me that being a photographer is 50% taking pictures and 50% keeping track of them. Add to that the need to publish collections of images as slide shows, portfolios, galleries, and client review sites, and it seems the work never ends anymore. Today, there are a gazillion photos on the Web and almost as many ways to publish them online.
1 THE MANY WAYS TO PUBLISH PHOTOS
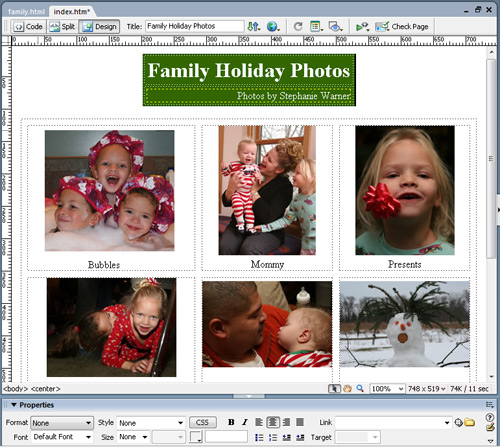
If you’re still looking for the best way to publish collections of pictures on the Web, your first challenge is deciding whether you want to create a carefully designed portfolio or a quick proof sheet for a client. In this column, let’s sort through some of the simplest ways you can put your photos online, including the built-in Web Photo Gallery in Photoshop, which was used to create this slide show in a matter of seconds, as well as more complex solutions such as the Flash slide show extensions you can download and add to Dreamweaver.
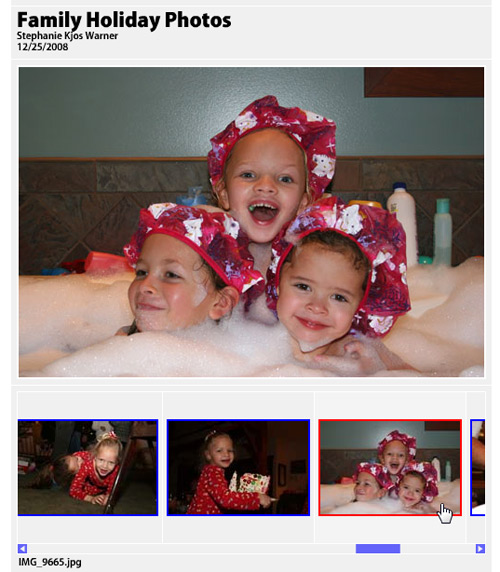
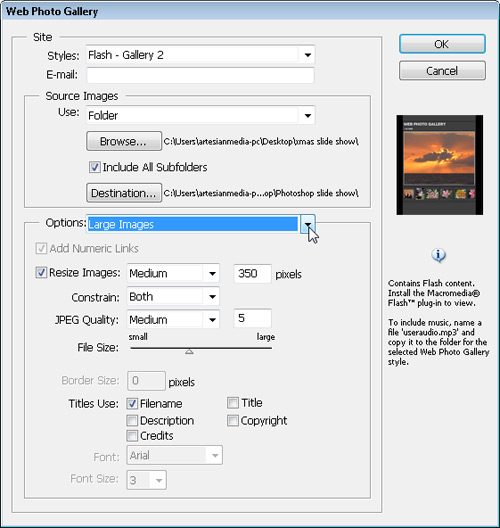
2 THE PHOTOSHOP WEB GALLERY
If you use Photoshop and you want to create a quick Web gallery with a folder full of snapshots, try File>Automate>Web Photo Gallery. Although the customization options are limited, this tool can save you time because it’s designed to automatically resize a collection of images, creating both thumbnail versions and larger images. You can even specify quality options and choose from designs created as Flash files or HTML and image files. Although the HTML code can make the pages difficult to edit in Dreamweaver, you can easily link the gallery to any page in your website. (Visit www.layersmagazine.com/when-html-goes-bad-html for tips on editing HTML in a Web gallery.)
3 WEB PHOTO ALBUM CREATOR
If you have Fireworks, consider using the Web Photo Album command included in Dreamweaver (you have to have Fireworks to use it). This tool is similar to the one in Photoshop, except that its layout options are more limited. That makes this tool fine for creating quick galleries, but if you want more control over the design, you may be happier with some of the extensions covered at the end of this column. Even if you create a custom layout, you can still use this feature to automatically resize a folder full of images, creating optimized images, matching thumbnails, and a series of pages that link them together (all in a matter of seconds.)
4 ADD TITLE; SELECT SOURCE IMAGES
To create an album, open or create a page in Dreamweaver (the Album feature is grayed out if you don’t have a file open). Choose Create Web Photo Album under the Commands menu. You can type a title, which will appear at the top of each Album page, and add up to two other lines of text using the Subhead and Other Info fields. Use the Browse button next to the Source Images Folder field to select the folder that contains the images you want to include in your album. Then use the Browse button next to the Destination Folder field and choose a folder where the new album files will be stored.
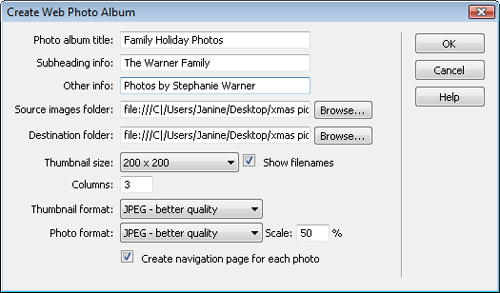
5 CHOOSE IMAGE SIZE AND QUALITY
In the Create Web Photo Album dialog, you can also choose among several thumbnail sizes, up to 200×200 pixels. The number of columns you enter controls how many thumbnails will be displayed across the page, each in its own Table cell. You can also choose a quality setting and size for the larger version of each image, which will be inserted in its own page and automatically linked to the thumbnail page and to the next and previous image pages in sequence.
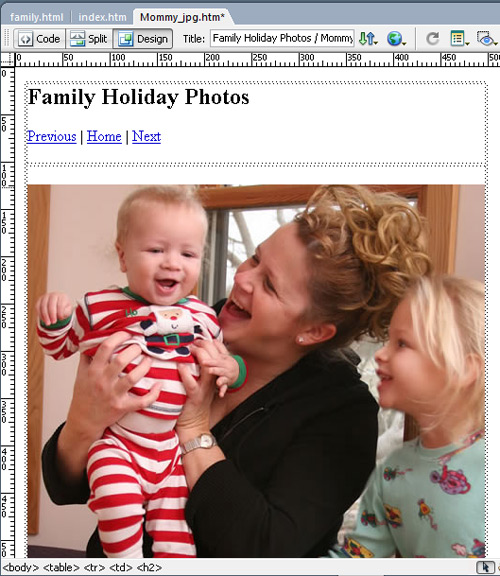
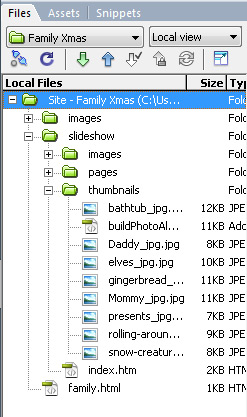
6 PREVIEW PHOTO ALBUM FILES
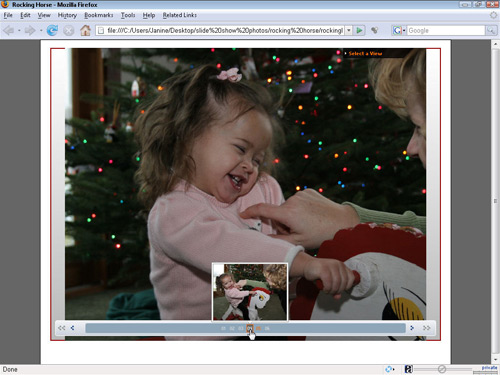
When you use the Web Photo Album dialog, Dreamweaver saves all of the files that are automatically created in the folder you selected as the Destination Folder. When the process is complete, you can open the folder in the Files panel to view or edit the thumbnail images, larger images, and any of the pages that were created and linked. The index.html file in the album folder is the first page of the slide show and displays the thumbnail images. Once you’ve created an album, you can edit any or all of the pages just as you would edit any other files in Dreamweaver.
7 SLIDE SHOW FEATURES VIA EXTENSIONS
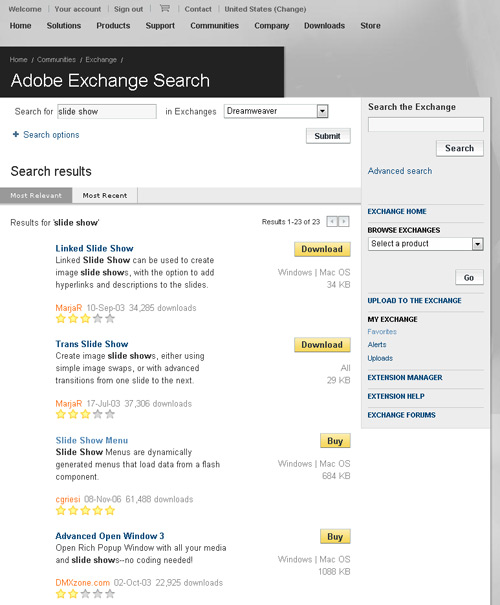
One of my favorite things about Dreamweaver is that you can add features through a growing list of extensions. Visit the Dreamweaver section of the Adobe Exchange site at www.adobe.com/exchange and you can search through hundreds of extensions created by third-party programmers, complete with customer reviews and rankings. A search for slide show finds more than 20 matches. Some of the best extensions are also the most expensive (you’ll find two recommendations at the end of this column), but there are a few that are free, including the one covered in the next few steps.
8 INSTALLING EXTENSIONS
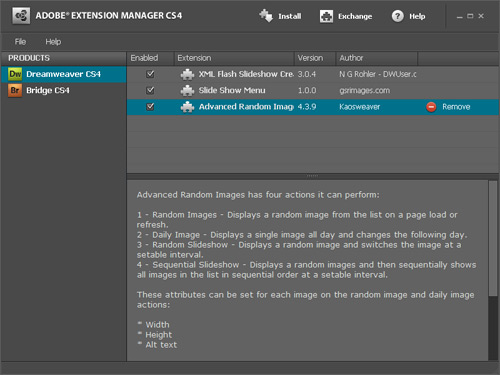
After downloading an extension from the Adobe Exchange site (or from a third-party developer), simply double-click on the .MXP file to launch the Dreamweaver Extension Manager, which automatically adds the extension. Installing new extensions is fairly self-explanatory, but you’ll want to pay attention to the instructions when it comes to finding these new features once they’re added. Extensions often add menu items and buttons, but they’re not always obvious if you don’t know where to look. Many are added to the Commands menu, but they can appear in other parts of the program as well.
9 THE RANDOM IMAGES SOLUTION
The Advanced Random Images extension by Kaosweaver is one of the more popular extensions on the Adobe site. You can use it to display a random image every time a Web page is loaded or to change an image daily. You can even create a random slide show. The extension, which can be added to Dreamweaver MX 2004 and later versions, creates JavaScript, works on both Mac and PC computers, and it’s free (although the programmer does welcome donations). You’ll find the Advanced Random Images extension under the Commands menu after it’s installed.
10 USING THE RANDOM IMAGES EXTENSION
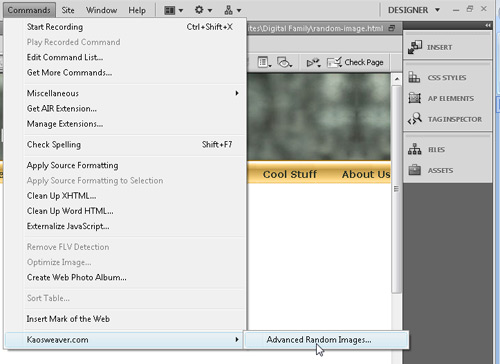
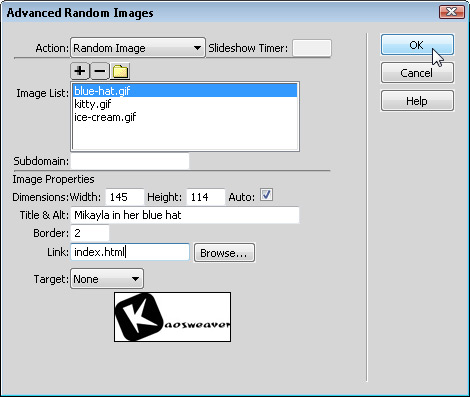
To use the Advanced Random Images extension, click to place your cursor where you want the random image added to your page, and then click the Commands menu and select Kaosweaver.com and then Advanced Random Images. In the dialog, select an Action, such as Random Image or Daily Image and then use the plus icon to add a collection of images the random image will be drawn from. With an image selected, you can specify the size, title and alt text, border, and link. Click OK. (Note that you won’t see the first random image displayed in Dreamweaver unless View>Visual Aids>Invisible Elements is checked.)
11 PREVIEW TO TEST YOUR WORK
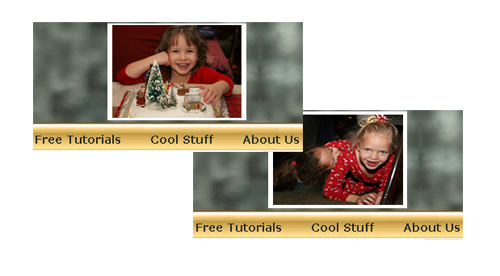
To view your slide show, you’ll need to preview the page in a Web browser. To do so, click the Preview button at the top of the workspace or choose File>Preview in Browser and then select any browser you have associated with Dreamweaver. Because the Random Images behavior is designed to display a new image each time the page is loaded, you’ll need to reload the page in the browser to get the full effect and see the images change randomly. Here you see the top of a banner image, with two different images displayed to show the effect.
12 THE XML FLASH SLIDESHOW EXTENSION
If you want even more options, consider the XML Flash Slideshow v3 extension from www.dwuser.com. For $29, this extension adds a variety of layouts, color customization, and many other settings. You can also add a title, caption, link, and other details to each image individually. And you can even add watermarks as you create galleries. Like the Web Photo Album in Dreamweaver, the extension can be used to resize images and thumbnails (as long as you have Fireworks on your computer). For detailed instructions for how to use this extension, look for “Using the Dreamweaver XML Flash Slideshow Extension” at www.layersmagazine.com.
13 THE 3D PHOTO WALL EXTENSION
If you’re looking for a more distinctive look for your photo galleries, you may want to choose an extension such as the 3D Photo Wall from www.dmxzone.com. Priced at more than $100, this is one of the most expensive extensions featured on the Adobe Exchange site, but it does have a high coolness factor. Using this program, you can automatically generate a wall of photos in a gallery that can be zoomed and panned to add interactivity and flair to your galleries. For detailed instructions for how to use this extension, look for “Using the Dreamweaver 3D Photo Wall Extension” at www.layersmagazine.com.

